Manage your project
The Magento Commerce Cloud project includes all code in Git branches, associated environments, and applications. Applications have environments and services that run on them including a database, web server, and caching server.
We provide a Project Web Interface and CLI commands to fully manage all aspects of your project. You have full access to all environments for Starter and Pro environments. You can also use SSH and CLI commands to manage your environments.
To manage your project, environment, and branches, see:
- Configure your project
- Project structure
- Create and manage users
- Manage branches with the Project Web Interface or CLI commands
- Snapshots and backup management
Project and environment variables
The following sections detail more about project and environment variables:
- Overview of environment variables
- Magento Commerce Cloud environment variables
- Magento application environment variables
- Configuration management
- Example of configuration management
Upgrade and patch
To upgrade and patch Magento, see:
Access the Project Web Interface
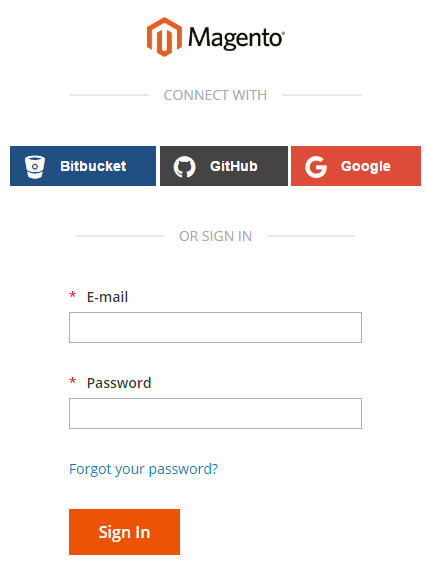
With your Magento Commerce Cloud account created, you can log into the Project Web Interface at https://accounts.magento.cloud.
Fastly, New Relic, and Blackfire credentials
Your project includes Fastly, New Relic, and Blackfire services. The project details display information for your project plan and important licenses and tokens for these integrations. Only the Account Owner has initial access to the credentials and services. You should provide these credentials to technical and developer resources as needed.
-
Fastly provides content delivery (CDN), image optimization, and security services (DDoS and WAF) for your Magento Commerce Cloud projects. See Get Fastly credentials.
-
Blackfire.io Profiler provides tools for reviewing and optimizing Magento and your store in your environments. The profiler checks every method and call, determining what occurs with performance metrics per step.
-
New Relic provides application metrics and performance information for Staging and Production environments.
To review your integration tokens, IDs, and more:
-
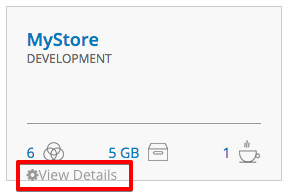
As the Magento Commerce Cloud Account Owner, log in to your project.
-
In the upper right corner, click <your name> > Account Settings.

-
On your account page, click View Details for your project to open general settings and plan details.
-
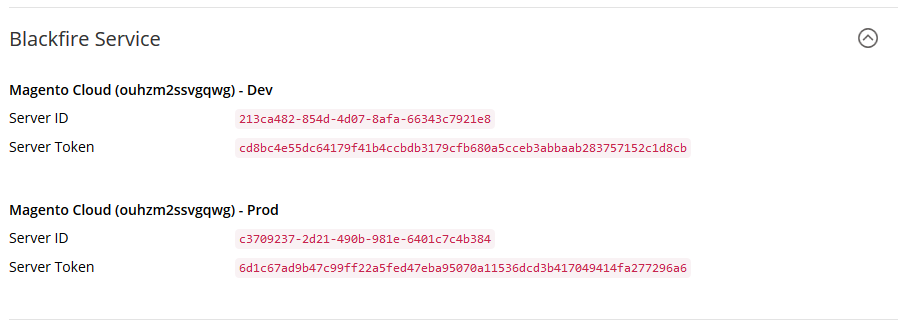
On your project details page, scroll to and expand Blackfire and New Relic to review your credentials.
Access the project and environments
When you first login, a list of projects you have access to displays. As a Project Owner, you may only see your company’s project. A Magento Solution Partner may see multiple projects for all of the clients they support.
Click on a project to access branches and more. On the page, you will see a hierarchy of environments named by the Git branch.
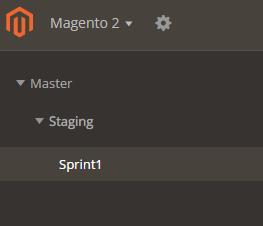
For Starter, you will see a hierarchy of branches starting from Master (Production). Any branches you create display as children from Master. We recommend creating a Staging branch, then branching from that for your Integration development. For more information, see Starter architecture.
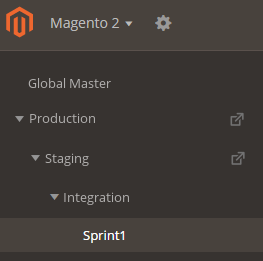
For Pro, you will see a hierarchy of branches starting from Production to Staging to Integration. The ![]() icon indicates these branches deploy to a dedicated server, used by Staging and Production. Any branches you create display as children from Integration. For more information, see Pro architecture.
icon indicates these branches deploy to a dedicated server, used by Staging and Production. Any branches you create display as children from Integration. For more information, see Pro architecture.
The following table details the branches for Pro:
| Branch | Environment | Description |
|---|---|---|
| (no branch) | Global Master | This “branch” captures global project changes including adding user accounts and variables. Important: Do not create branches from or merge to Global Master. |
production |
Production | This is a child branch from master with a deployment target. You cannot branch from this branch. You merge code from master to this branch to go live with updated configurations and code. |
staging |
Staging | This is a child branch from master with a deployment target. You cannot branch from this branch. You merge code from master to this branch to test in a pre-production environment. |
master |
Integration master | The master branch of the single repository. In the Project Web Interface, this is called Integration. You branch from master for your development on your local, generating an environment when you push code. When this code is complete, you merge to staging and production. |
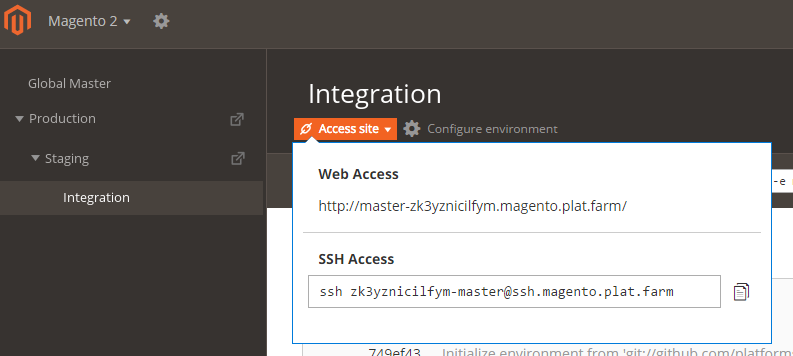
To access an environment store and admin, select a branch and click Access Site. A list of store URLs and SSH command display. Select the URL to view the store in that environment.
The Pro plan Production environment includes three nodes that you can access using the following links:
- Load balancer URL:
http[s]://<your domain>.c.<project ID>.ent.magento.cloud -
Direct access to one of the three redundant servers:
http[s]://<your domain>.{1|2|3}.<project ID>.ent.magento.cloudThe production URL is used by the content delivery network (CDN).
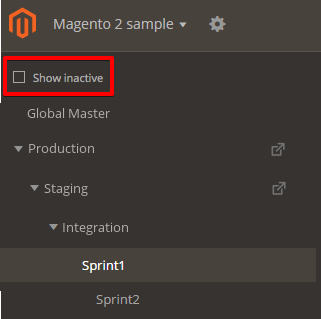
If you have inactive Git branches of code, you can toggle displaying the branches in the hierarchy.
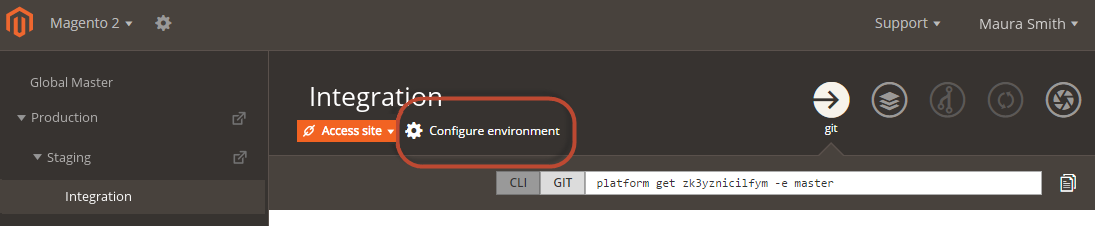
Configure environments
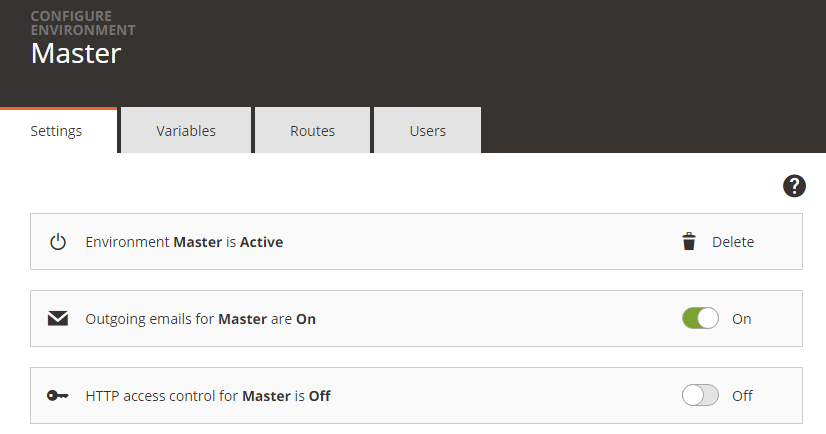
You can manage variables and settings for Production, Staging, and Integration environments through this interface, or with CLI commands. Click Configure environment to create and manage environments, each of which corresponds to a Git branch.
This displays the following page, which enables you to configure settings, variables, routes, and users.
Environment configuration variables
On the Variables tab, you can view, create, and manage environment variables for your project. For example, after we add your project to the Magento Commerce Cloud Fastly service account, you can view the Fastly API token and service ID credentials as shown in the following example:
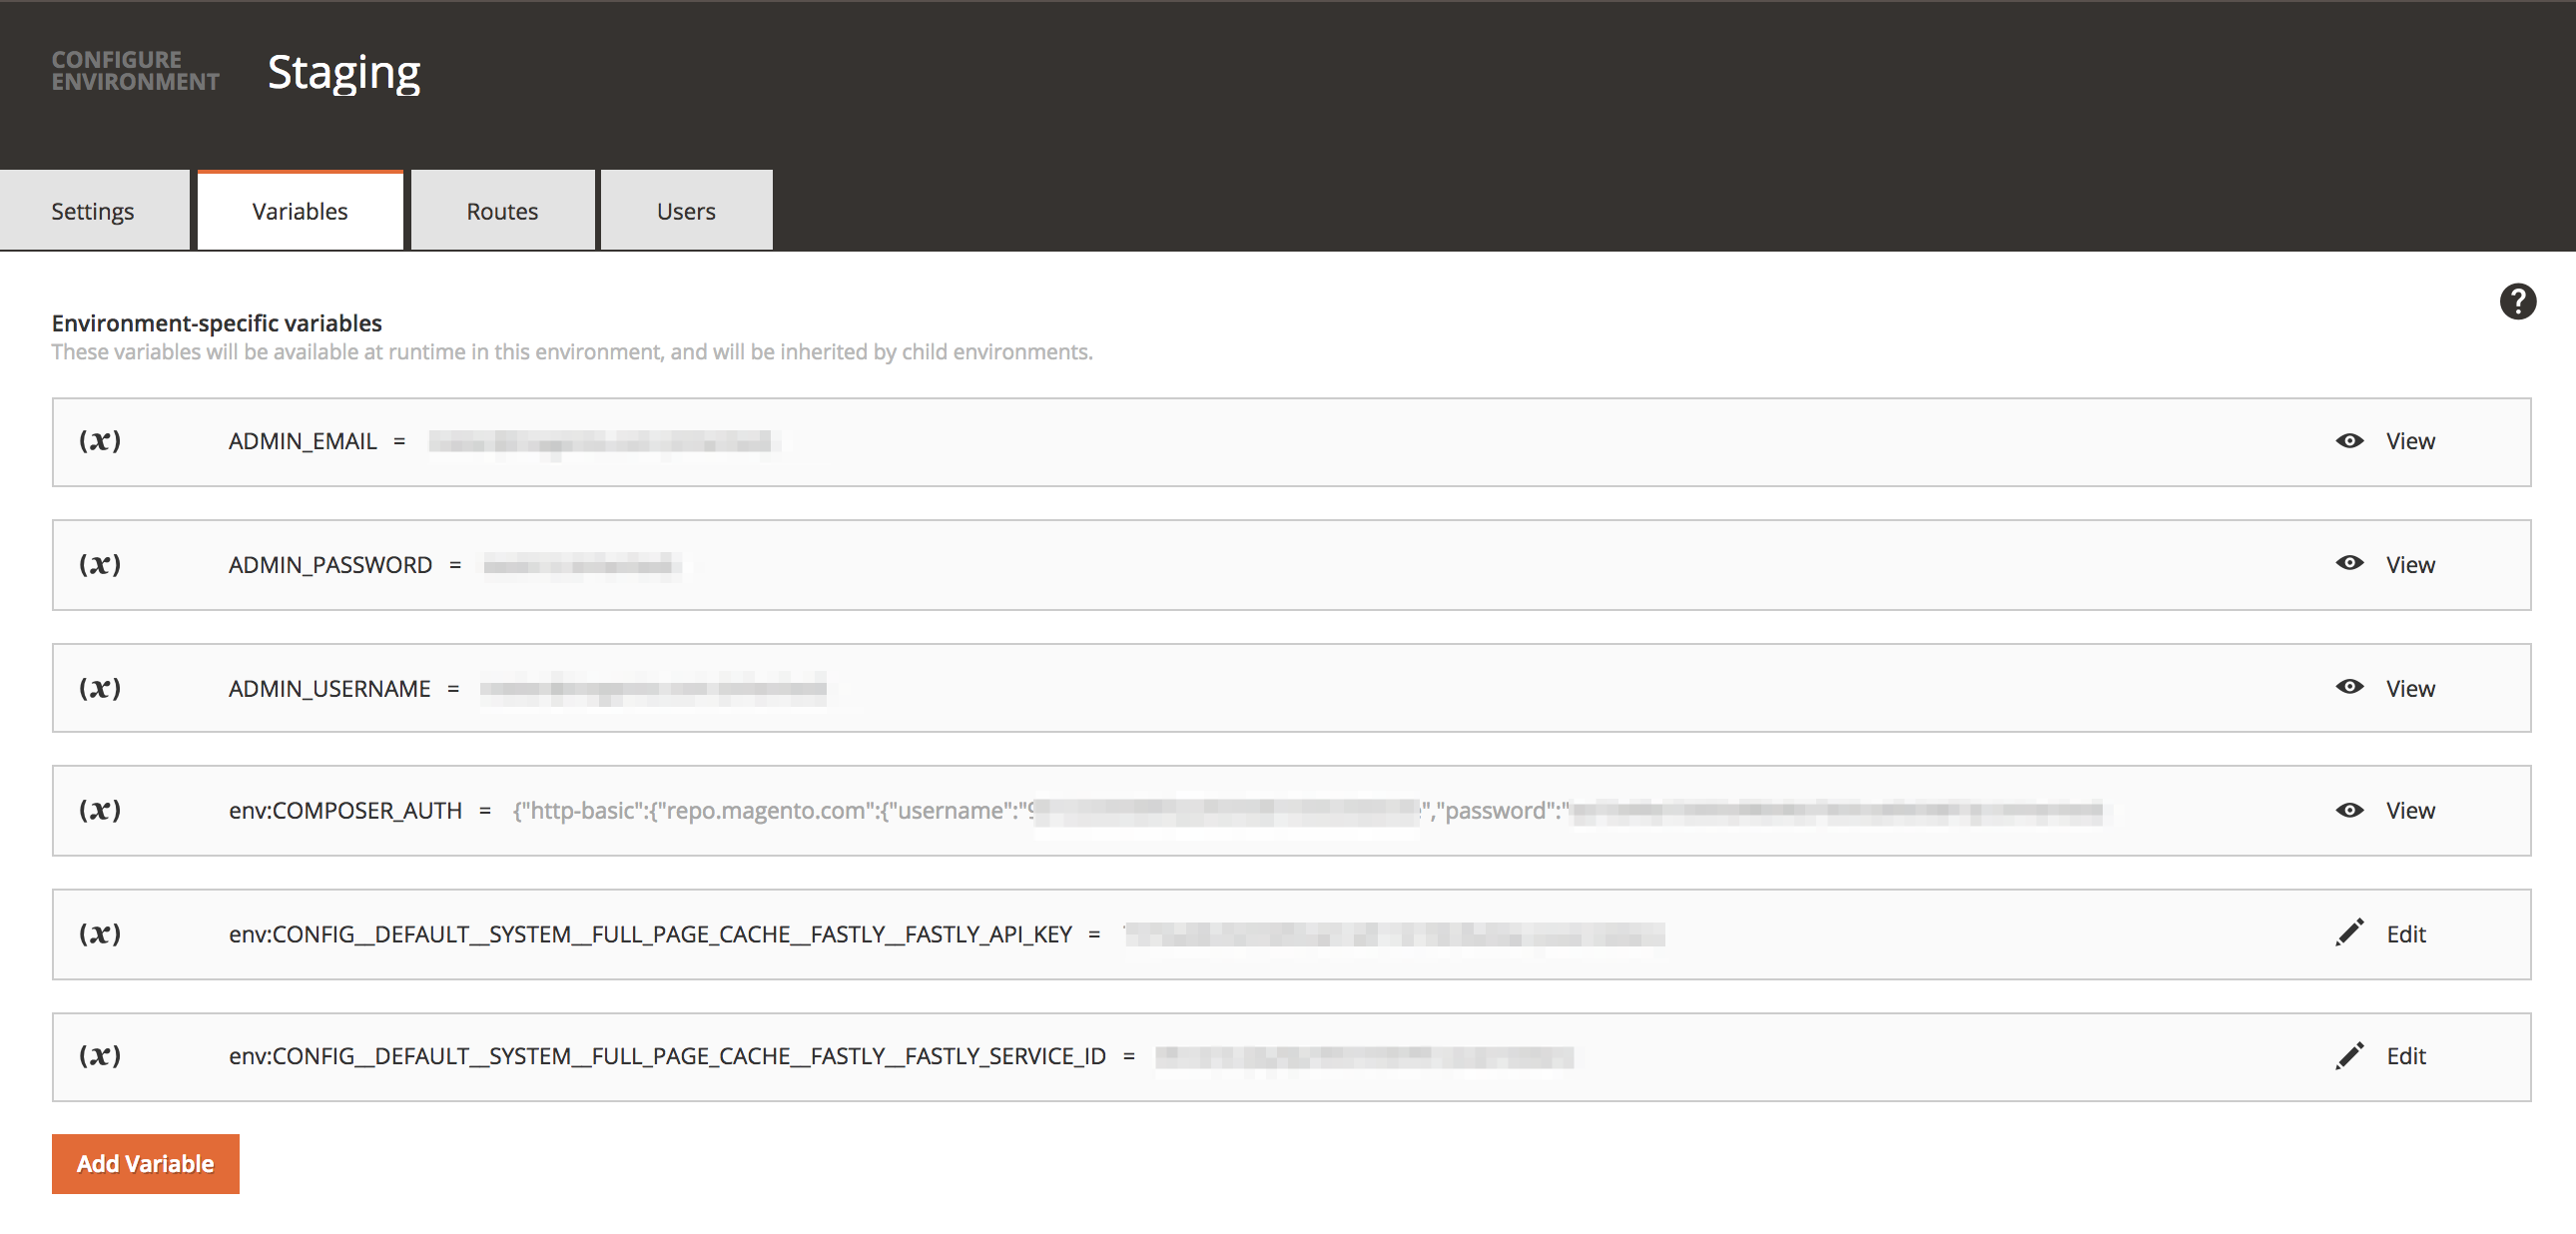
You can also list and review environment variables using the following Magento Cloud CLI command.
1
magento-cloud variable:get -e <environment ID>
Configure the project
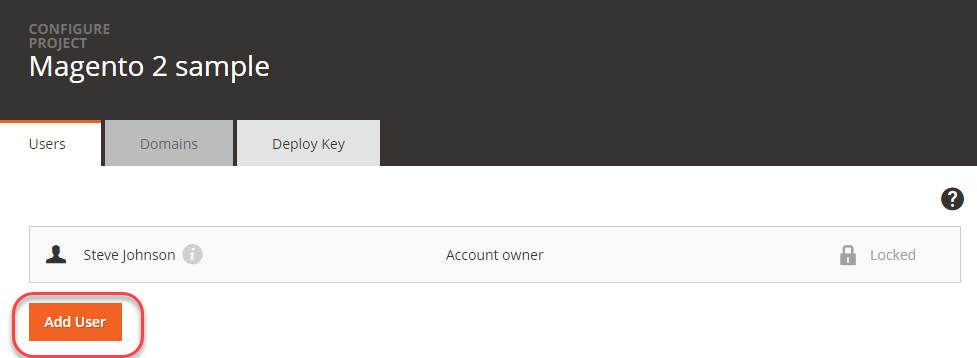
Click  (edit) to display users and deploy keys associated with the project. You can modify access and permissions across the entire project and per environment (or branch).