New Relic services
New Relic for application performance management (APM) is a software analytics product that helps you analyze and improve application interactions. New Relic APM is available to all Magento Commerce Cloud accounts and provides the following features:
- Focus on specific transactions—Actively mark and monitor key customer actions in your site, such as adding to the cart, checking out, or processing a payment.
- Database query monitoring—Locate and monitor database queries affecting performance.
- App Map—View all application dependencies within your Magento site, extensions, and external services.
- Apdex scores—Evaluate performance and create alerts that identify issues and notify you when they occur, such as site performance affected by a flash sale or web event. Apdex score.
- Adobe-generated alert policies–Monitor application and infrastructure performance using alert policies that monitor key performance indicators like apdex score, disk space, and error rate based on industry best practices. See Monitor performance using alerts.
Your Magento Commerce Cloud account includes the software for the New Relic APM service along with a license key. You do not need to purchase or install any additional software.
On Magento Commerce Cloud Pro accounts, the Production environment also includes the New Relic Infrastructure (NRI) service, which automatically connects with the application data and performance analytics to provide dynamic server monitoring.
For Pro accounts, if New Relic APM is not installed on the Staging and Production environments or New Relic Infrastructure is not available in the Production environment, submit a support ticket to request installation.
Manage your New Relic account
When Magento provisions your Magento Commerce Cloud project, the Project Owner receives an email from New Relic with credentials and instructions for accessing the account. If you did not receive the email, use the Project Owner email address to reset the New Relic password.
An account can have only one person assigned to the Owner role. If you must change the account owner, assign the Admin role to the current Owner, then assign the Owner role to another user. See Update the account owner in the New Relic documentation for instructions.
Before assigning the Owner role to a user, verify that the user exists on the New Relic account for Magento Commerce Cloud. If you need to add the user to that account and an existing account Owner or Admin cannot help, any Magento user with access to the Magento Partnership Owner Account for New Relic can add users on behalf of the customer.
We recommend adding at least one Admin user to your New Relic account to manage all access, integrations, and tool usage. Magento Commerce Cloud Project Owners and Admin users can add and remove users from the New Relic account.
To add a user:
-
Using your Project Owner New Relic credentials, log in to New Relic.
-
From the account dropdown menu, select Account settings > Account > Users and roles.
-
Click New user.
-
Add the name and email address for the account.
-
Assign the user role: Admin, User, or Restricted.
-
Click Add user.
-
Ask the new user to check their email for a New Relic notification with account information.
Set up the New Relic service
Pro environments are preconfigured to use New Relic services.
For Starter environments, you must check the .magento.app.yaml file to verify that the runtime section includes the New Relic extension. If the extension has not been configured, add the following:
.magento.app.yaml
1
2
3
runtime:
    extensions:
        - newrelic
Connect to New Relic
To connect a Cloud environment to New Relic, you must add the New Relic license key to the environment.
-
For Pro accounts, Magento adds the license key to your Cloud environments during the provisioning process. You can log in to your New Relic account and verify connectivity.
-
For Starter accounts, you have a New Relic license key that supports up to three environments. You must add the New Relic license key to your Starter Project environments. We recommend adding the key to the Staging and Production (master) environments, and one other environment of your choice. If you have more than three active environments using the same New Relic license key, you must remove the license variable from an existing environment.
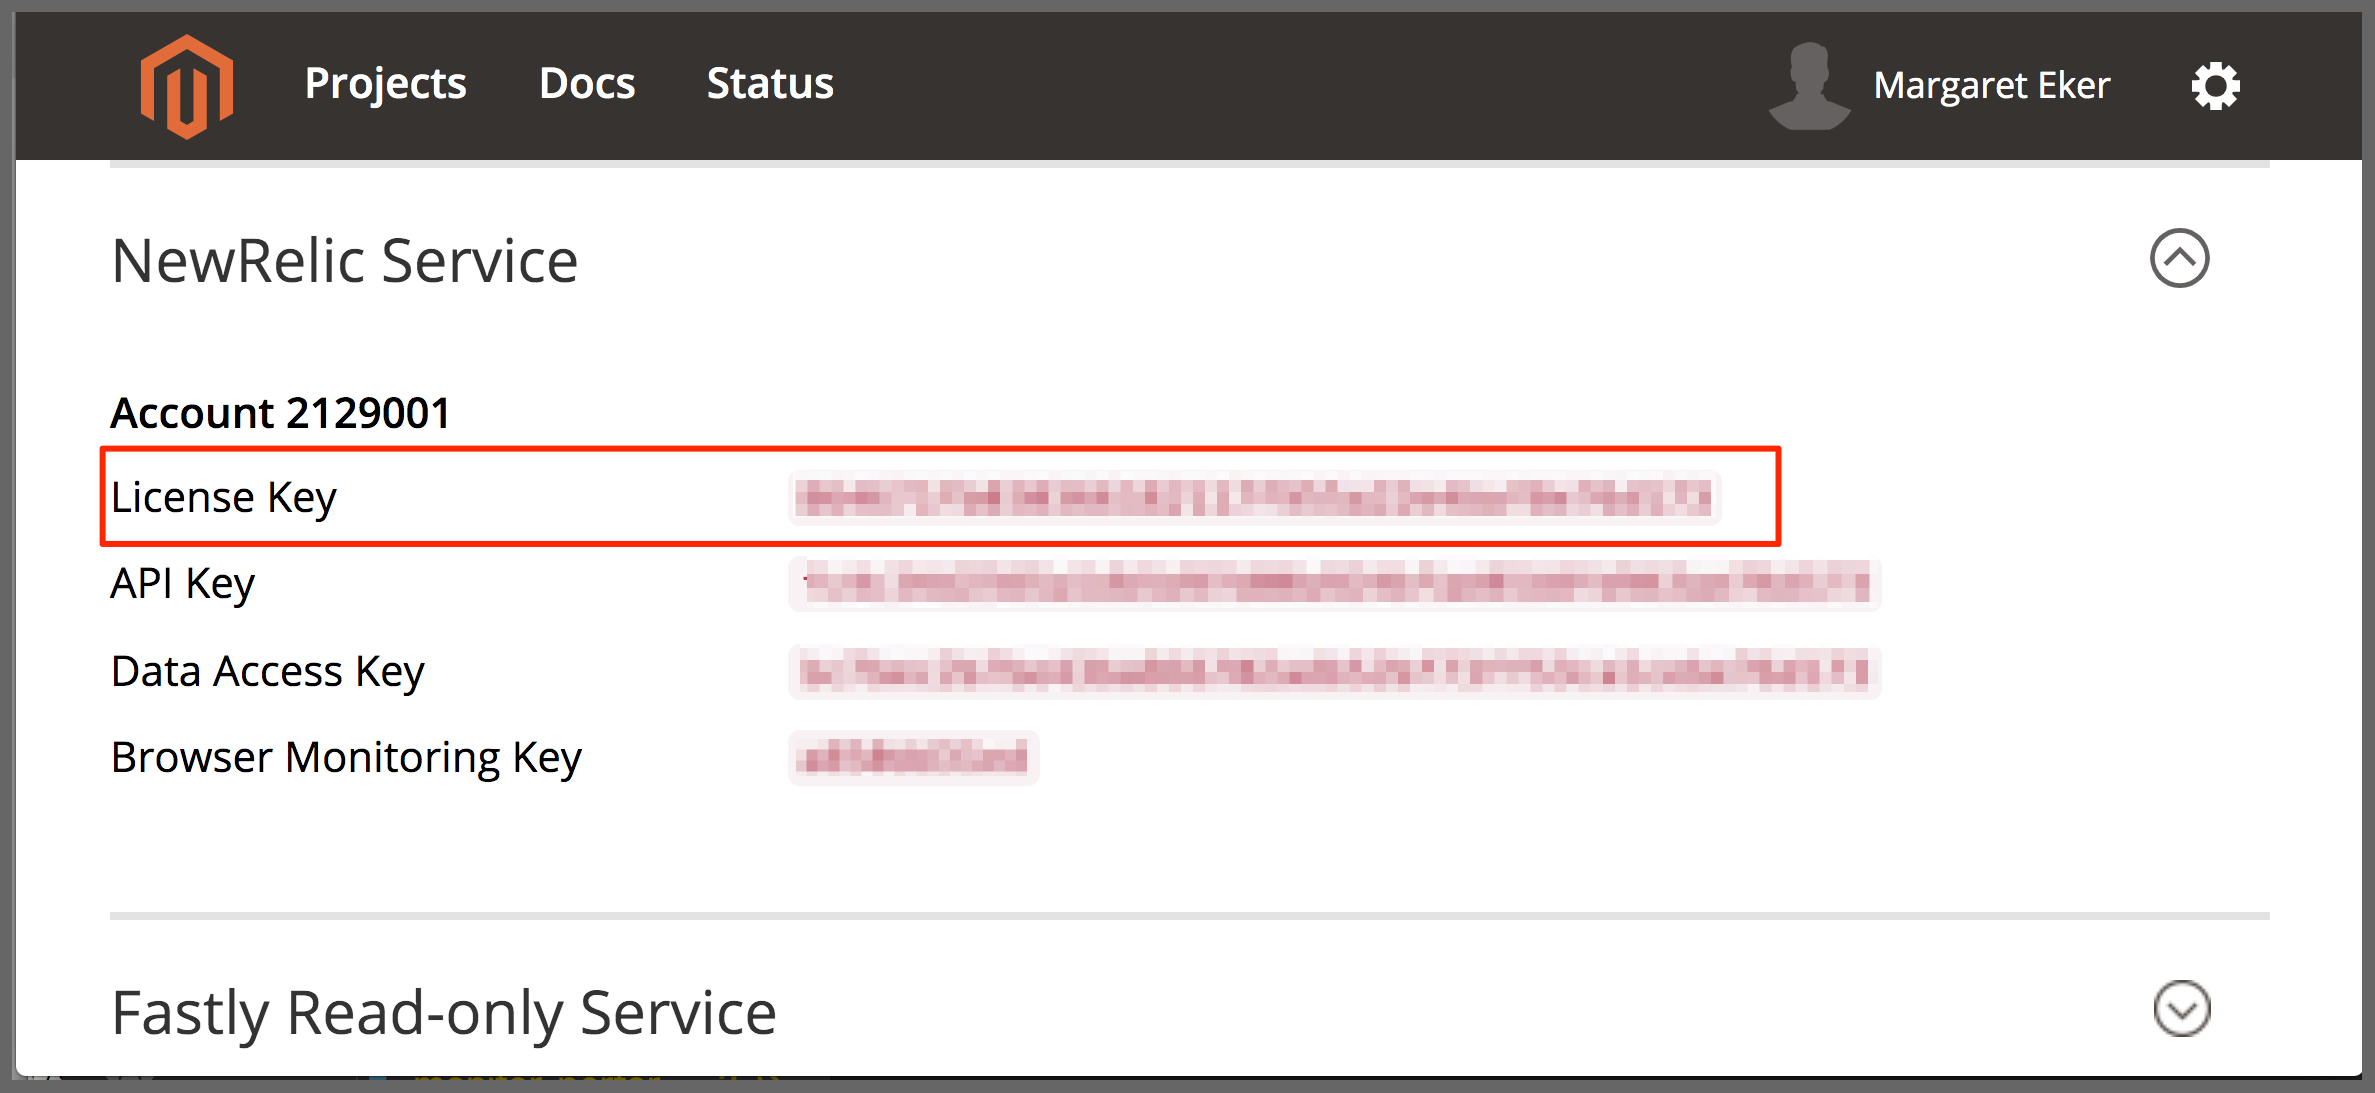
To find your New Relic license key:
-
Open your account page.
-
On the Projects tab, find your project.
-
Click View Details to see the project infrastructure information.
-
Expand the NewRelic Service section to view the license key.
-
Copy the license key.
To add a license key to an environment:
-
Change to the environment that needs the license key. For Starter accounts, you need to use the license key to set a variable in the environment.
-
Set the variable.
1
magento-cloud variable:set php:newrelic.license <newrelic-license-key>
Adding a variable to an environment triggers a redeployment to update the environment variables and values. See Working with variables.
-
Log in to New Relic to verify that it is receiving data.
To remove a license key from an environment:
-
List environment variables.
1
magento-cloud vget
Response:
1
2
3
4
5
+----------------------+------------+------------------------+
| Name                 | Level      | Value                  |
+----------------------+------------+------------------------+
| php:newrelic.license | environment| <newrelic-license-key> |
+----------------------+------------+------------------------+
If you added the license key as a project variable, you must remove that project-level variable. A project variable adds the license to every environment branch created, which can consume or exceed the license limit. To list project variables:
magento-cloud pvget -
Delete a variable.
1
magento-cloud variable:delete php:newrelic.license
Removing a variable from an environment triggers a redeployment to update the environment variables and values. See Working with variables.
Investigate performance
New Relic connects and monitors your infrastructure and application using PHP agents. After a Cloud environment connects to New Relic, you can review the data collected by the agent by logging into your New Relic account.
On the APM Applications page, use the New Relic APM Overview to view information about your application.
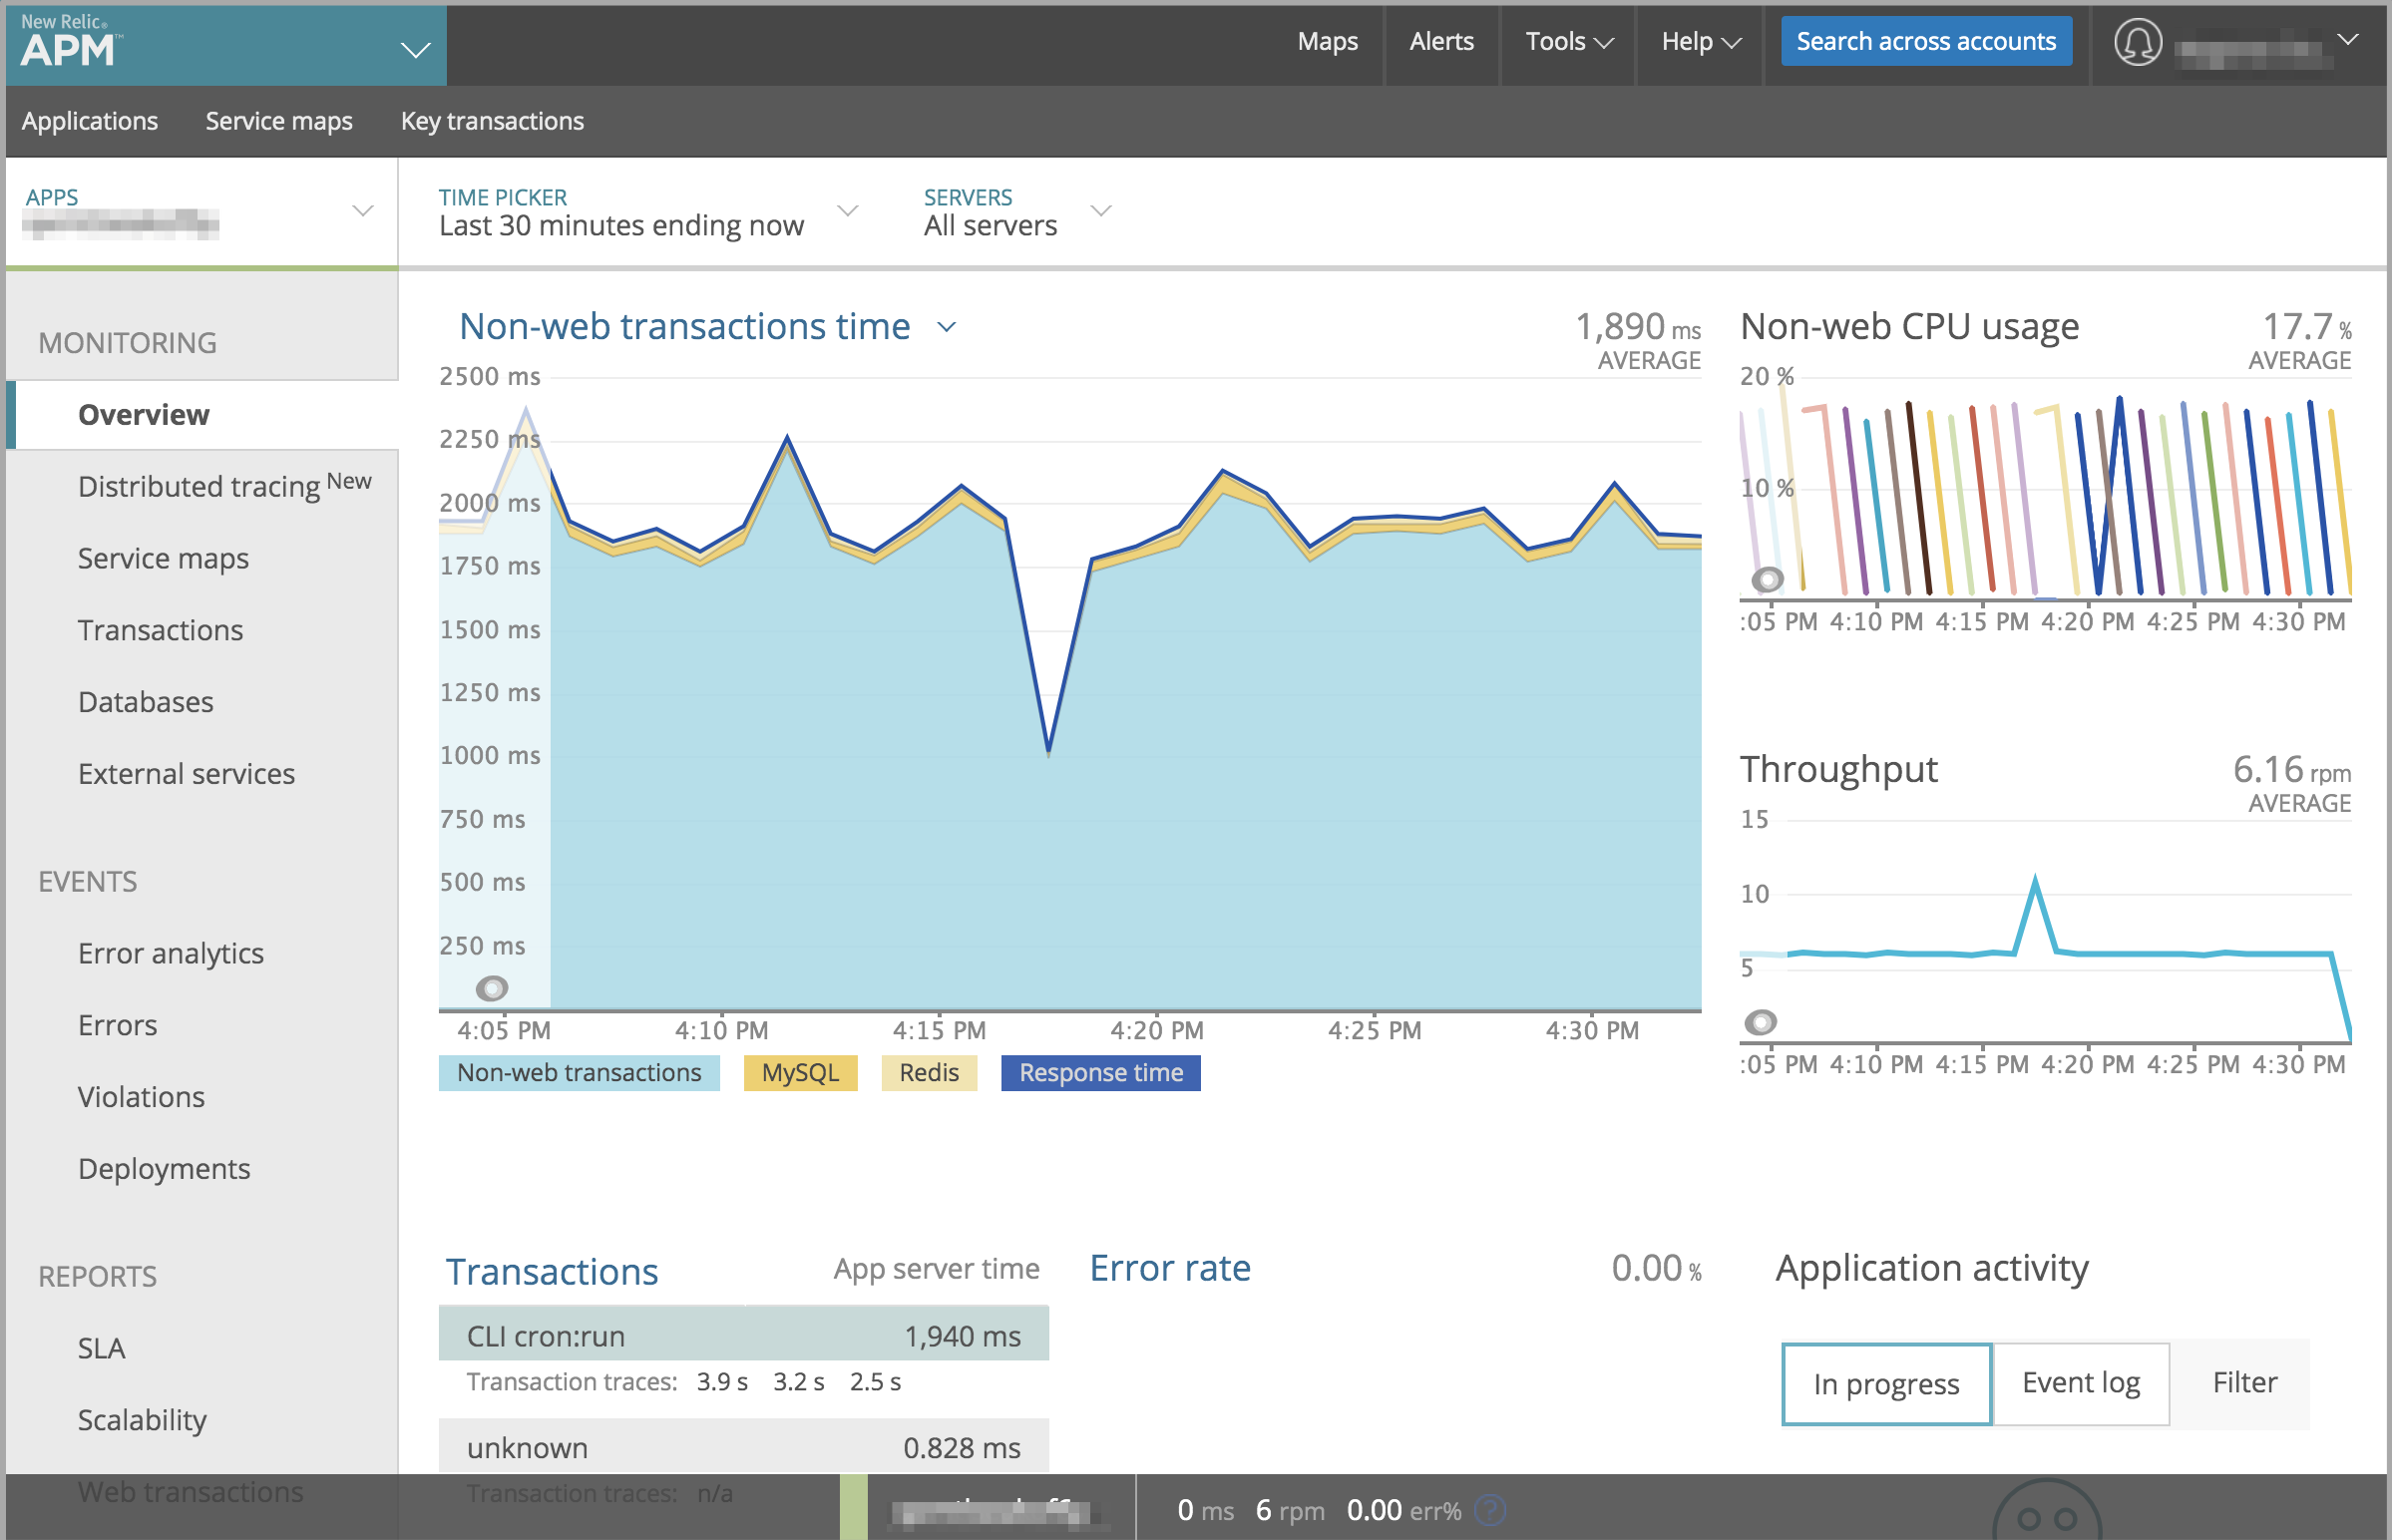
From this view, you can track and find the following types of information:
- Applications and transactions encountering slow responses or bottlenecks
- Customer comments about issues with your site
- Applications with high transaction time
- Traffic to transaction time
We recommend reviewing tracked data:
-
Most time consuming—Determine time consumption by tracking requests in parallel. For example, you may have the highest transaction time spent in product and category views. If a customer account page suddenly ranks very high in time consumption, your application might be affected by a call or query dragging performance.
-
Highest throughput—Identify pages hit the most based on the size and frequency of bytes transmitted.
All collected data details the time spent on an action transmitting data, queries, or Redis data. If queries cause issues, New Relic provides information to track and respond to those issues.
You can learn more about using the New Relic APM and Infrastructure agents to collect and analyze application data from the New Relic APM and New Relic Infrastructure documentation.
Monitor performance with alert policies
Adobe provides a set of New Relic alert policies for Magento Commerce Cloud Pro and Starter Production environments to track the following key performance metrics:
- Apdex score
- error rate
- disk space (available on Pro Production environments only)
Based on industry best practices, these policies set thresholds for warning and critical conditions that affect performance. When your site experiences an infrastructure or application issue that triggers an alert threshold, New Relic sends alert notifications so that you can proactively address the issue. To use these policies, you must configure notification channels to receive the alert messages.
For Pro Staging and Integration environments and Starter environments, use Health notifications to monitor disk space.
Prerequisites
- Credentials to log in to the New Relic account for your Cloud project.
- Verify that your Cloud environment is connected to New Relic.
To review Adobe-generated alert policies:
-
Use your Project Owner New Relic credentials to log in to your New Relic account.
-
From the navigation menu, select Alerts > Alert Policies.
-
In the Search Policies field, search for Adobe Generated Policy.
-
You should see a set of policies like the ones below:
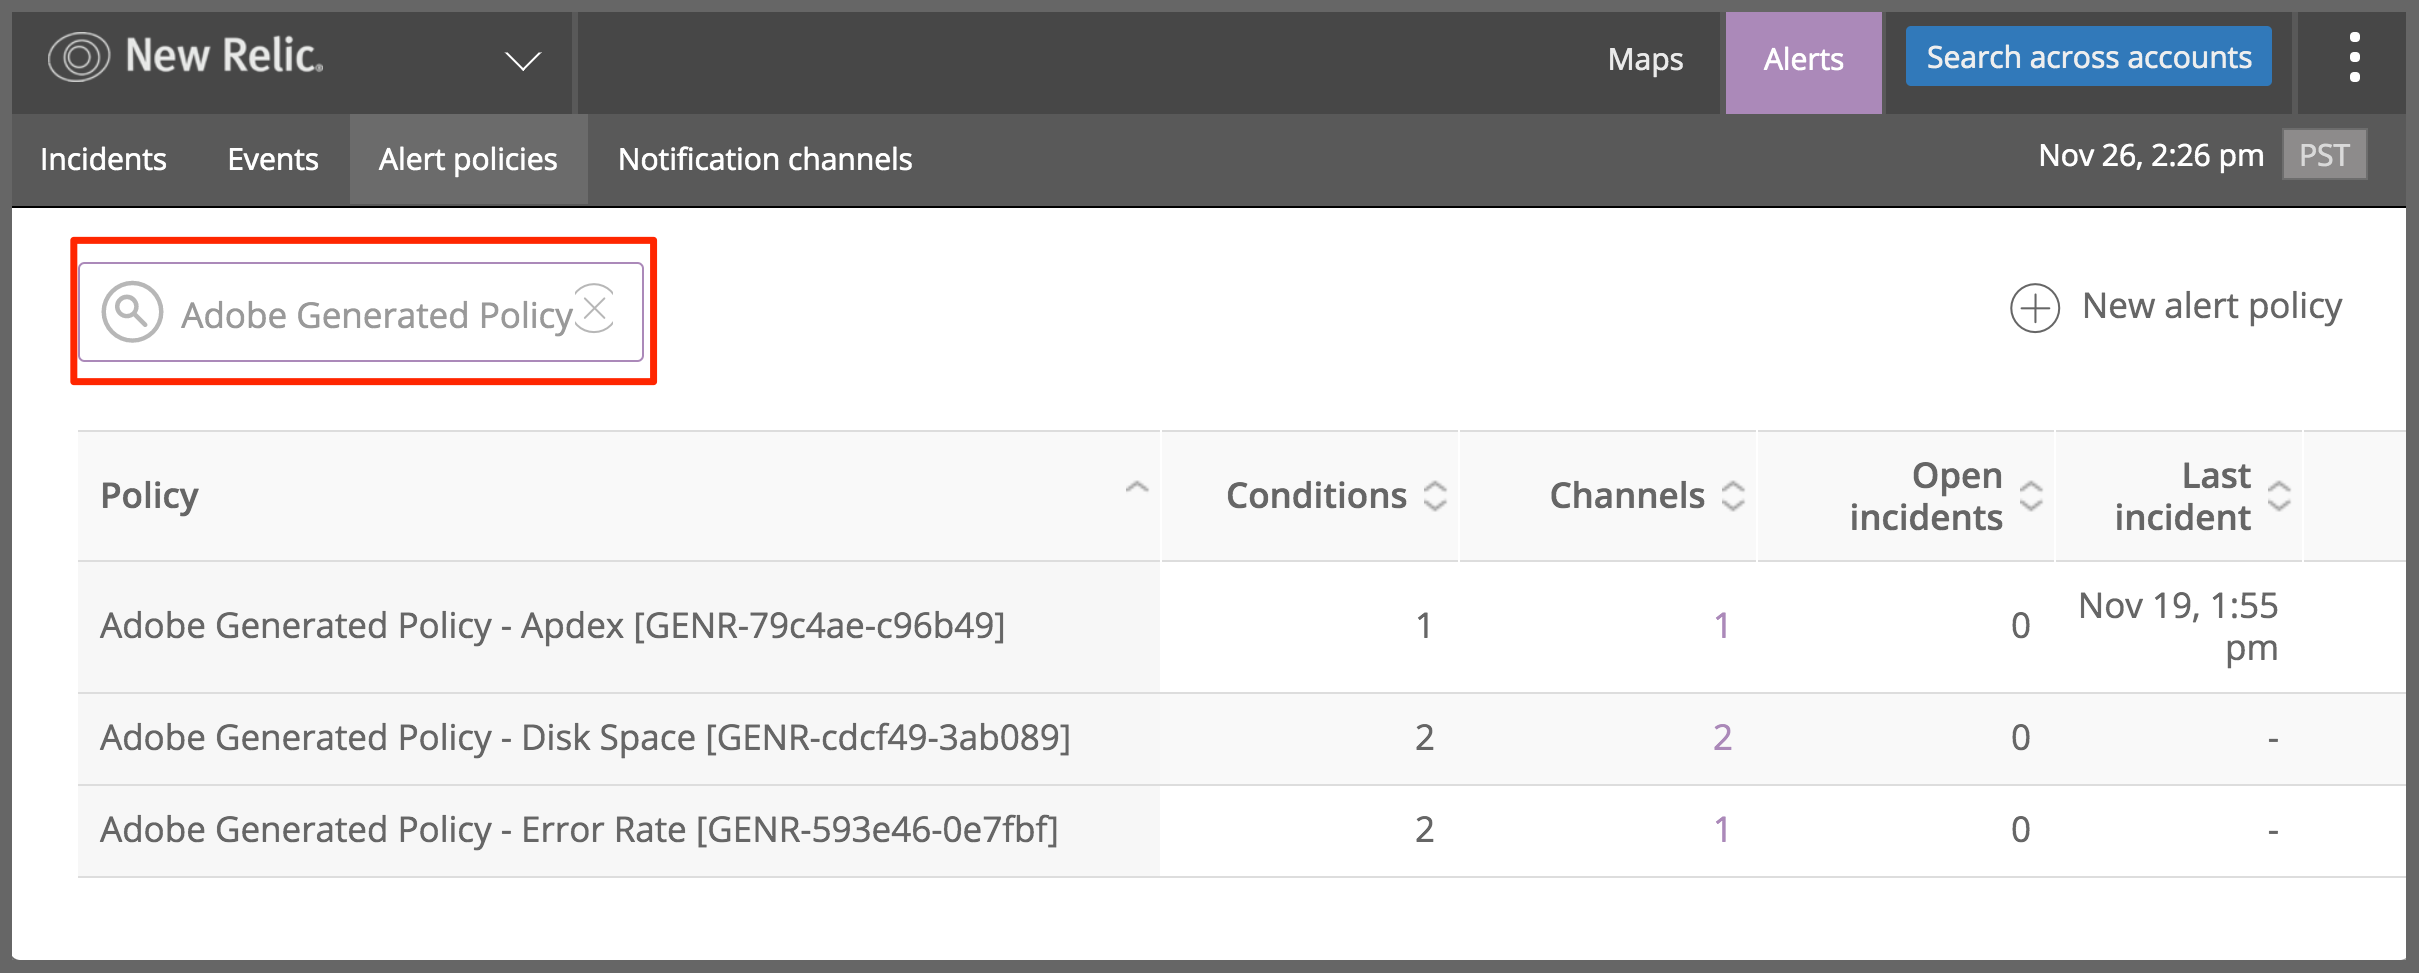
If you do not see these alert policies, submit a Magento support ticket. Include your project ID in the ticket. These policies are available on Pro and Starter Production environments only.
-
Click an alert policy name to review the threshold conditions that trigger alerts.
Configure notification channels
To use the Adobe-generated alert policies to monitor your Production sites, you must configure notification channels and map them to alert policies. Notifications about performance issues go to all channels associated with an alert policy when conditions on the application or infrastructure trigger an alert. You also receive notifications when an issue is acknowledged and closed.
New Relic provides templates for configuring different types of notification channels including email, Slack, PagerDuty, webhooks, and more. See the Instructions for specific notification channels in the New Relic documentation to review the prerequisites for using each type.
The following instructions describe the high level steps to configure a notification channel to receive alert messages triggered by an alert policy.
To configure a notification channel:
-
Choose a notification channel type, and complete any prerequisite steps required to connect the channel with the New Relic service.
-
Navigate to the New Relic APM page.
-
On the New Relic APM Applications page, open the application for your Cloud environment.
-
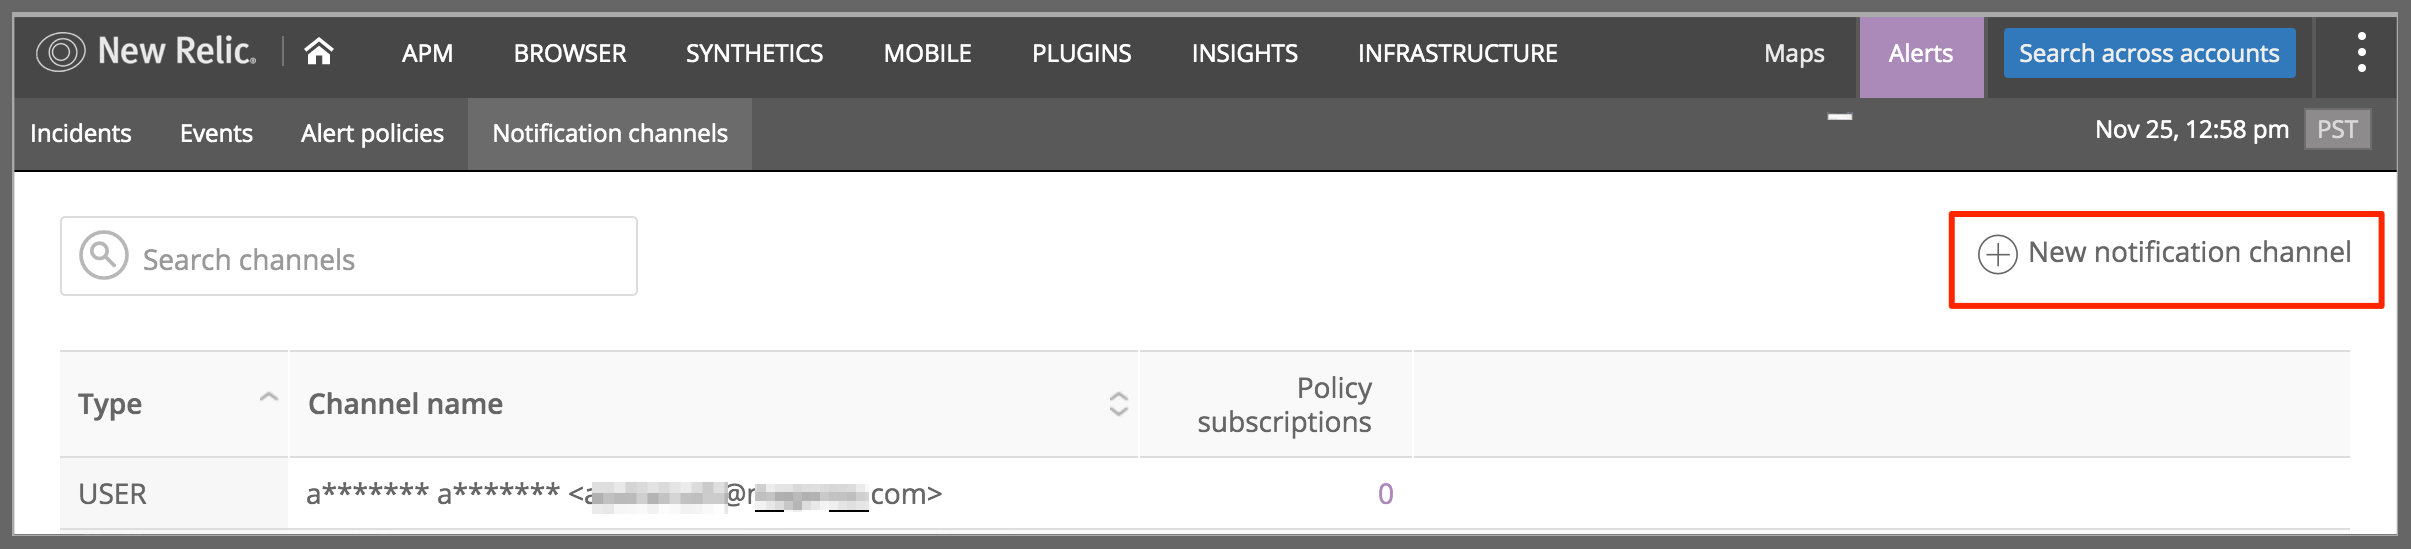
On the Alerts page, click New notification channel.
-
On the Create a new notification channel page, choose the channel type from the Select a channel type dropdown menu.
-
Configure the settings for the channel, and then click Create channel.
-
On the Channel details page, click Send a test notification to verify that the channel works.
-
To specify the alerts to send to the channel, click the Alert policies tab.
-
On the Alert policies page, click Add alert to select and add an alert policy.
See the following New Relic documentation topics for additional information:
The Adobe-generated policies have default notification channels configured to notify Magento teams that support Magento Commerce Cloud customers. Do not modify the configuration for these default channels, and do not remove any alert policies assigned to them.
Create Alert Policies
Do not modify the Adobe-generated alert policies. We will automatically regenerate and improve them over time, which will overwrite any customizations you make.
If you want to modify the thresholds of an alert condition, create a new alert policy. Then, copy the alert condition to the new policy. See Update policies or conditions in the New Relic documentation.
See Alerts concepts and workflow in the New Relic documentation for more detailed information about Alerts, alert policies, and notification channels.