Manage branches with the Project Web Interface
Every Magento Commerce Cloud environment has an associated active Git branch. You can manage your environments using either the Project Web Interface, the Magento Cloud CLI, or Git commands. For more information on Git branches, see Git documentation.
For more information about managing environments using the CLI, see Manage branches with the CLI.
This topic discusses how to use the Project Web Interface to:
- Add or delete an environment. You cannot add or delete the
masterbranch for Pro plan Staging and Production. You can branch from Start plan Master. - Sync (
git pull) from the environment’s parent - Merge (
git push) to the environment’s parent
You cannot create branches from Pro plan Staging and Production master. These environments include master branches that you deploy updated Git code to from Integration master.
Add or delete an environment
Complete development of code and added extensions in a branch and, when complete, merge (git push) the branch with its parent or master.
- For Starter, we recommend you create a
stagingbranch from Master, then branch fromstagingfor development. - For Pro, create a development branch from the Integration environment.
For branching strategies, review Starter and Pro architecture overviews.
Your account supports a limited number of active Git branches and an unlimited number of inactive branches. Manage active and inactive branches by deleting a branch. When deleted, it is deactivated and still listed in the project branches list. You can either activate the branch later or you can delete it entirely using the CLI.
If you need additional environments for development, enter a Support ticket for more information.
Add a branch
To add a branch:
- Log in to your project.
-
In the left navigation bar, click the name of the parent environment.
Your new branch is cloned from this environment. Choose a parent environment that is similar to the environment you’re about to create.
- Click
 .
. -
In the provided field, enter a branch name. In many cases, the environment name is the same as its ID.
The environment name is different from the environment ID only if you use spaces or capital letters in the environment name. An environment ID consists of all lowercase letters, numbers, and allowed symbols. Capital letters in an environment name are converted to lowercase in the ID; spaces in an environment name are converted to dashes.
An environment name cannot include characters reserved for your Linux shell or for regular expressions. Forbidden characters include curly braces (
{ }), parentheses, asterisk (*), angle brackets (>), ampersand (&), percent (%), and other characters. - Click Branch.
-
Wait while the environment deploys.
During deployment, its status is In process, as the following figure shows.

After a successful deployment, the status changes to Success:

-
Continue with one of the following:
Delete to make a branch inactive
To delete an environment and make it inactive:
- Log in to your project.
- In the left pane, click the name of the branch to delete.
-
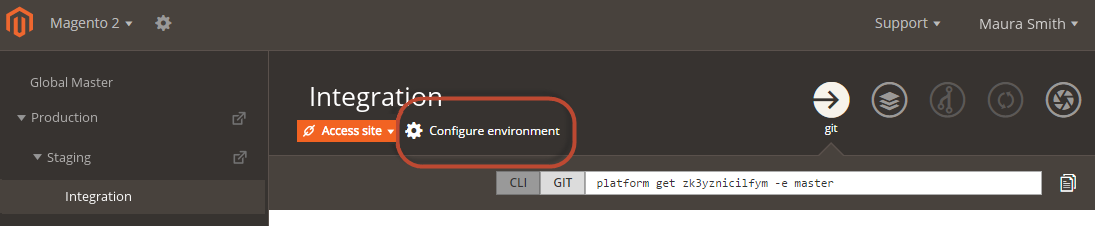
Click Configure environment as the following figure shows.
- Click the Settings tab.
-
Click Delete next to the environment’s status, as the following figure shows.

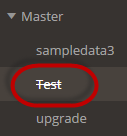
A deleted (that is, inactive) environment displays with its name stricken out as the following figure shows.
Sync from the environment’s parent
Syncing an environment (or branch) is the same as git pull origin <parent>. You sync to get updated code from a parent environment. You can use this feature through the interface for all Starter and Pro environments.
For Pro plan, you can also sync from Staging and Production to your Integration master branch. This sync only pulls and pushes code, not data. To sync data, you will need to dump the database data and push it to another environment’s database. For more information, see Migrate and deploy static files and data.
To sync an environment with its parent:
- Log in to your project.
- In the left pane, click the name of the branch you want to sync.
- Click
 (sync).
The following prompt displays:

- Select the checkbox next to each item to sync and click Sync.
Merge with the environment’s parent
Merging an environment is the same as git push origin. You merge to push updated code from an environment to its parent environment (that is, a Git branch). You can merge this code up through the parent-child relationships to master. You can also deploy to Staging and Production using the merge command.
To merge an environment with its parent:
- Log in to your project.
- In the left pane, click the name of the branch you want to merge.
- Click
 (merge).
 - Click Merge to confirm the action.
View logs
Through the Project Web Interface, you can review various logs for environments including build, deploy, and deployment history.
For Starter environments, you can review build and deploy logs and the deployment history. These environments include Master (Production) and all branches created from it.
For Pro environments, you can review the following logs per environment:
- Integration–Build and deploy and deployment history
- Staging–Build logs and deployment history. You need to SSH into the server to view deploy logs.
- Production–Build logs and deployment history. You need to SSH into the server to view deploy logs.
- Log in to your project.
- In the left pane, click an environment to review logs for.
- The right pane provides a deployment history of one entry per action attempted including syncs, merges, branches, snapshots, and more.
- To view the build log, select the Success or Failure link per deployment record on the account.
Pull code from a private Git repository
Your Magento Commerce Cloud project can include code located in a private Git repository. For example, you may have code for a custom module or theme in a private repo. To do so, you must add your project’s public SSH key to your private Git repository and update your project’s composer.json.
To add a deployment key to your private GitHub repository, you must be the administrator of that repository. GitHub allows you to use a deploy key for one repository only.
If your project needs to access multiple repositories, you can choose to attach an SSH key to an automated user account. Because this account won’t be used by a human, it’s referred to as a machine user. You can then add the machine account as collaborator or add the machine user to a team with access to the repositories it needs to manipulate.
We highly recommend adding and merging this code to your project Git repositories. If you do not configure the connection, you will have build issues.
Find your deploy key
To find your project SSH public key (also referred to as a deploy key):
- Log in to your project using the Web Interface.
- Click Configure Project.
-
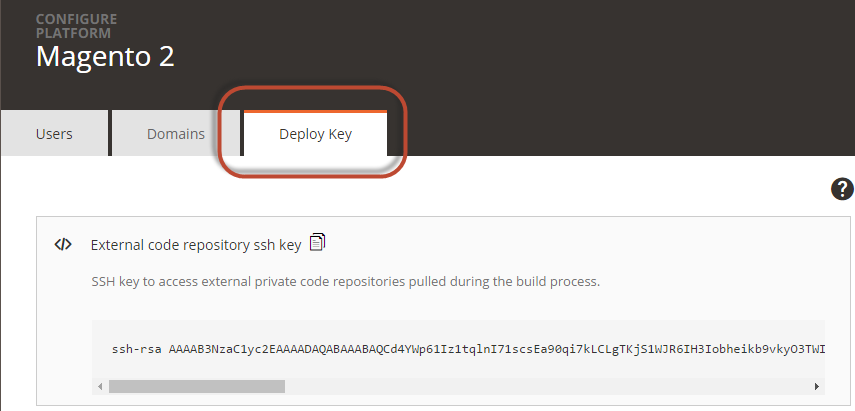
Click Deploy Key.
The following figure shows an example.
- Copy the deploy key to the clipboard.
- See Enter your GitHub deploy key.
Enter your GitHub deploy key
On GitHub, deploy keys are read-only by default. Your Magento project won’t push code to the private repository.
To enter your project’s public key as a GitHub deploy key:
- Log in to your GitHub repository as its administrator.
-
Click Settings as the following figure shows.

If you do not see this option, you are not the repository administrator and you cannot complete this task. Ask your GitHub project administrator to do this.
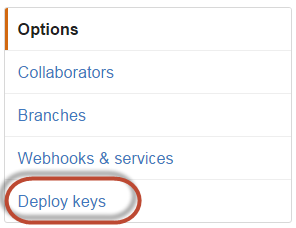
-
On the Settings page, in the left navigation bar, click Deploy Keys as the following figure shows.
- Click Add deploy key.
- Follow the prompts on your screen to complete the task.
In composer.json, use the <user>@<host>:<.git</code> format, or ssh://<user>@<host>:<port>/<path>.git if using a non-standard port.
Enter your Bitbucket deployment key
To enter your project’s public key as a Bitbucket deploy key:
- Log in to your Bitbucket repository as its administrator.
-
In the left navigation bar, click Settings as the following figure shows.
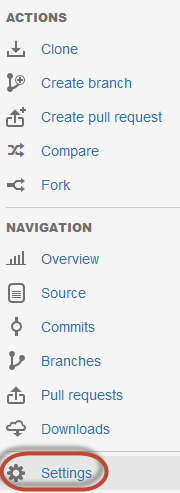
-
Click General > Deployment Keys as the following figure shows.
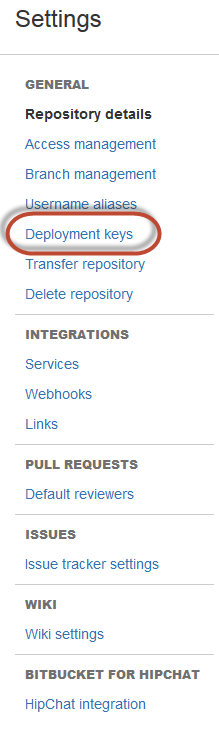
- Click Add Key.
- Follow the prompts on your screen to complete the task.
Secure your environments and branches
You can access your project and environments from any location through a web browser using the Project Web Interface. You may have security set for your Production environment, stores, and sites. This section helps you secure your Integration and Staging environments for strictly your developers, DBAs, and more.
To secure your Starter and Pro environments:
- Log into your Project Web Interface.
- Select an environment branch.
- Click Configure Environment.
- On the Settings tab, click ON for HTTP access control to enable secure access. You can choose between credentials or IP addresses to filter for access.
- To filter by credentials, click Add Login, enter a username and password, and click again Add Login to add.
-
To filter by IP address, enter the IP addresses in a list with
denyorallow. For example:1 2 3 4
123.456.789.111/29 allow 123.456.789.112/29 allow 234.123.567.111/29 allow 0.0.0.0/0 deny
- Click Save.
The branch redeploys to update the environment security and settings.
We recommend testing your environments after completing security settings.