Customize error and maintenance pages
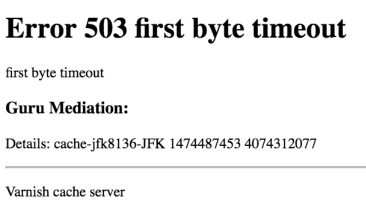
When a request to the Fastly origin fails, Fastly returns default response pages with basic formatting and generic messaging that can be confusing for users. For example, Fastly returns the following default error page when a request to the Fastly origin fails because of a 503 error.
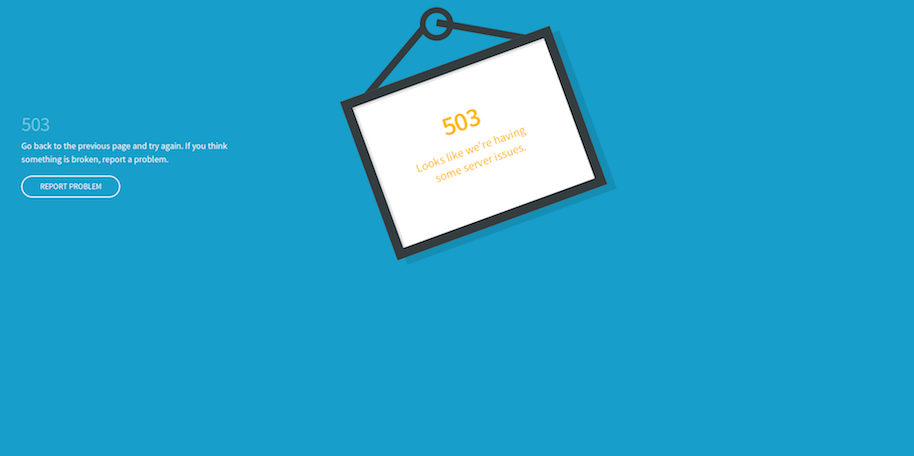
You can update your store configuration to replace some default response pages with pages that have friendlier messaging and improved HTML styling as shown in the following example.
Currently, you can customize the following Fastly response pages for your Magento Commerce Cloud project through the Magento Admin UI.
- Timeout or site maintenance outages (503 Service Unavailable)
- WAF blocking events that occur when the WAF detects suspicious request traffic (403 Forbidden)
HTML coding requirements:
The HTML code for the custom page must meet the following requirements:
- Content can contain up to 65,535 characters.
- Specify all CSS inline in the HTML source.
- Bundle images in the HTML page using base64 so that they display even if Fastly is offline. See Data URIs on the css-tricks site.
Customize the 503 error page
Customers see the default 503 error page in the following cases:
- When a request to the Fastly origin returns a response status great than 500.
- When the Fastly origin is down, for example due to a timeout, maintenance activity, or health issues.
You can customize the default page by adapting the following HTML code to include styling to match your Magento Commerce store theme and modifying the title and messaging as needed.
1
2
3
4
5
6
7
8
9
<!DOCTYPE html>
<html>
   <head>
      <meta charset="UTF-8">
         <title>503</title>
   </head>
   <body>
      <p>Service unavailable</p>
   </body></html>
Verify that the modified source displays correctly in the browser. Then, add the customized HTML code to the Fastly configuration.
To add the custom response page to the Fastly configuration:
-
Click Stores > Settings > Configuration > Advanced > System.
-
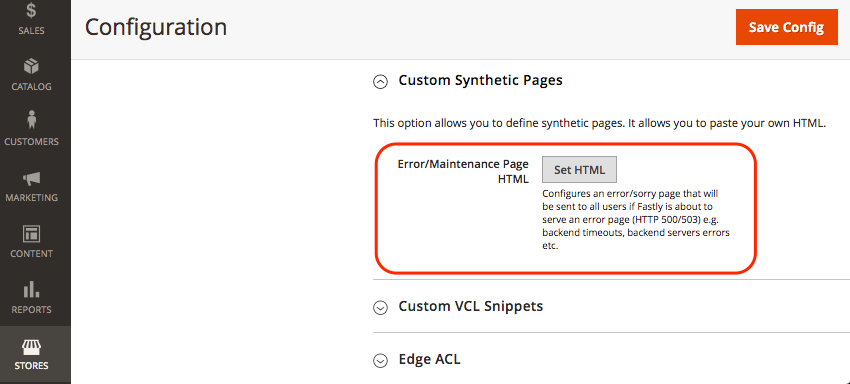
In the right pane, expand Full Page Cache > Fastly Configuration > Custom Synthetic Pages.
-
Click Set HTML.
-
Copy and paste the source code for your custom response page into the HTML field.
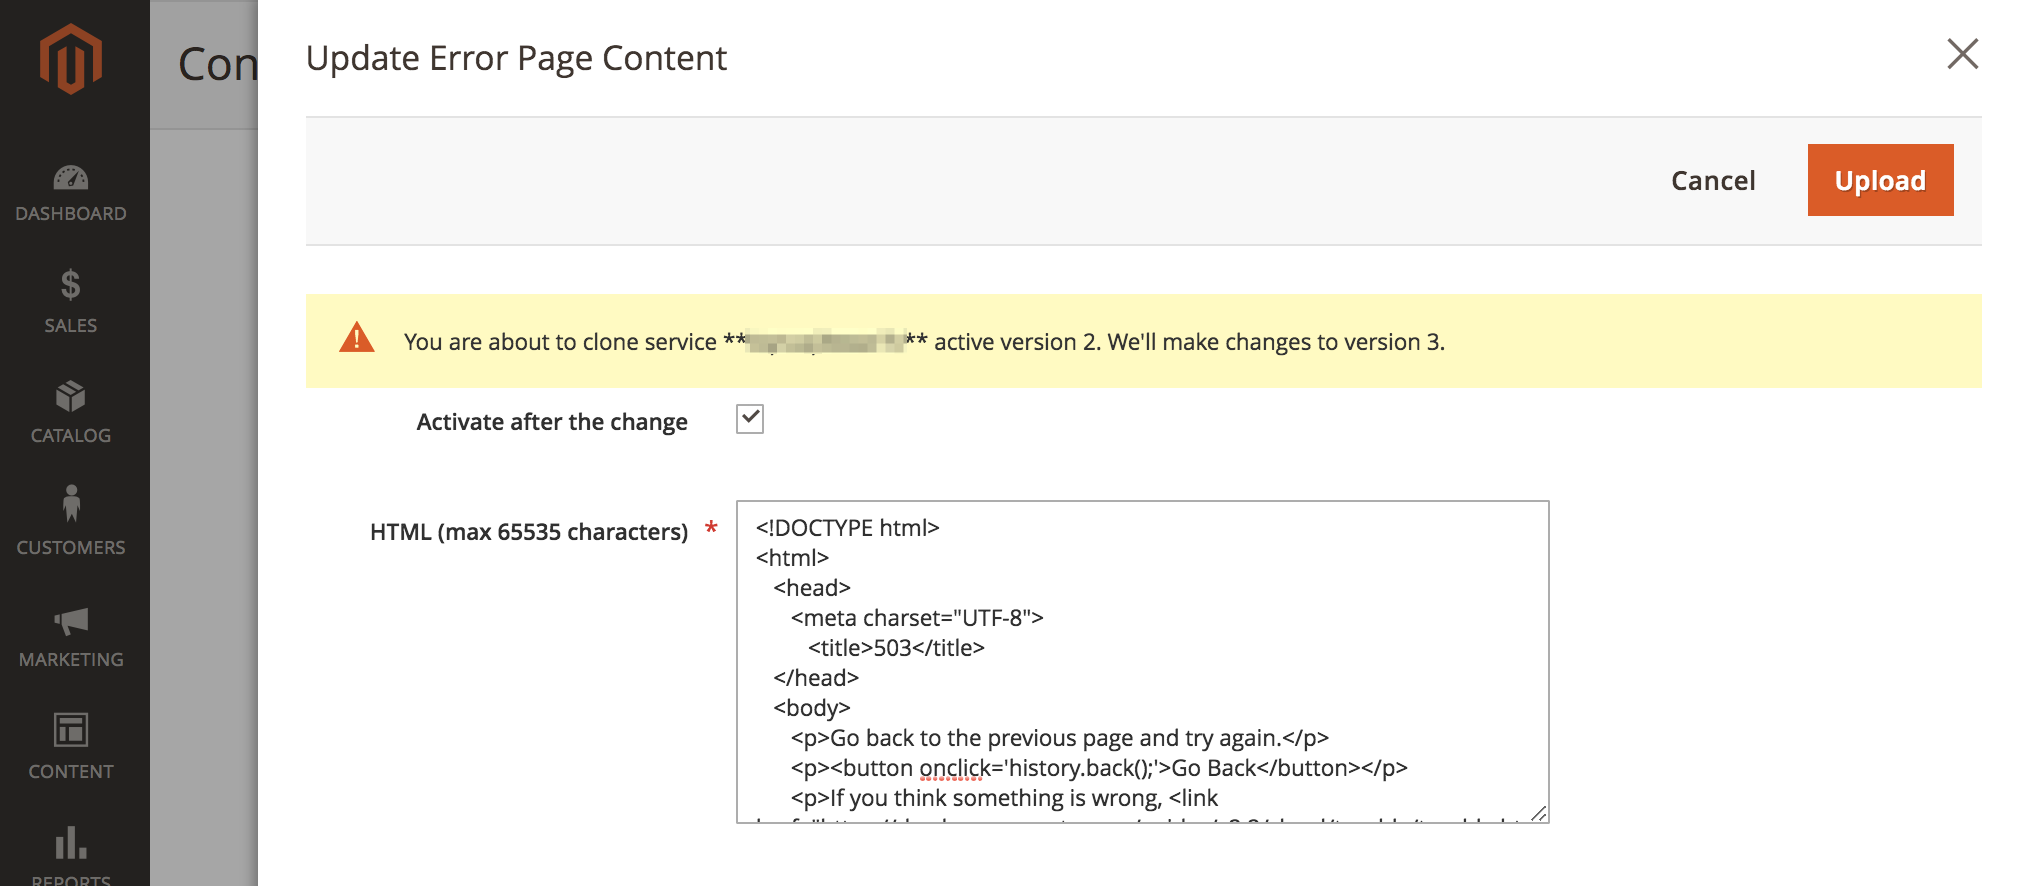
-
Click Upload at the top of the page to upload the customized HTML source to the Fastly server.
-
Click Save Config at the top of the page to save the updated configuration file.
-
Refresh the cache.
-
In the notification at the top of the page, click the Cache Management link.
-
On the Cache Management page, click Flush Magento Cache.
-
Customize the WAF error page
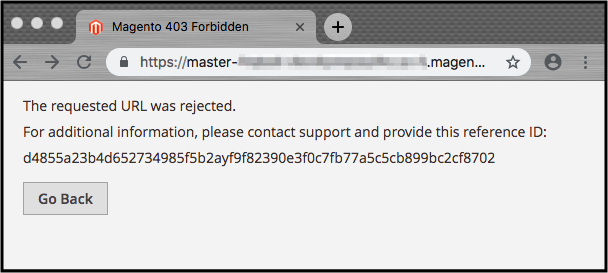
Customers see the following default WAF error page when a request to the Fastly origin fails with a 403 Forbidden error caused by a WAF blocking event.
The following code sample shows the HTML source for the default page:
1
2
3
4
5
6
7
8
9
10
11
<html>
  <head>
    <title>Magento 403 Forbidden</title>
  </head>
  <body>
    <p>The requested URL was rejected.</p>
    <p>For additional information, please contact support and provide this reference ID:</p>
    <p>"} req.http.x-request-id {"</p>
    <p><button onclick='history.back();'>Go Back</button></p>
  </body>
</html>
You can use the Custom Synthetic Pages > Edit WAF page option in the Fastly configuration menu to customize the default code for your Magento Commerce Cloud project. When you edit the code, retain the following line that provides the reference ID for the WAF blocking event:
1
<p>"} req.http.x-request-id {"</p>
The Edit WAF option is available only if the Managed Cloud WAF service is enabled for your project.
To edit the WAF error page:
-
Click Stores > Settings > Configuration > Advanced > System.
-
In the right pane, expand Full Page Cache > Fastly Configuration > Custom Synthetic Pages.
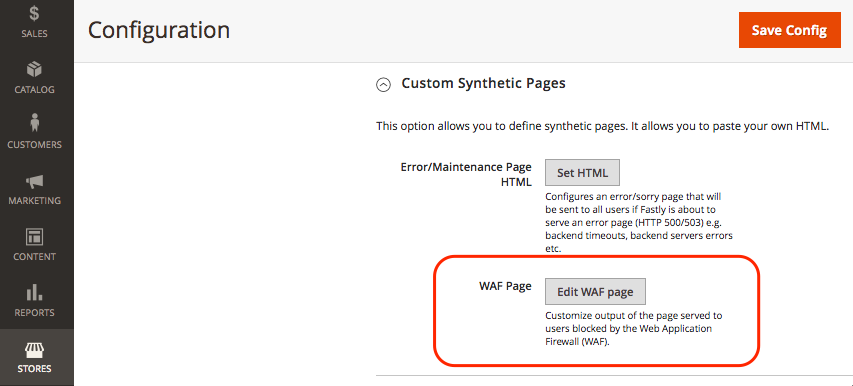
-
Click Edit WAF page.
-
Complete the fields to update the HTML.
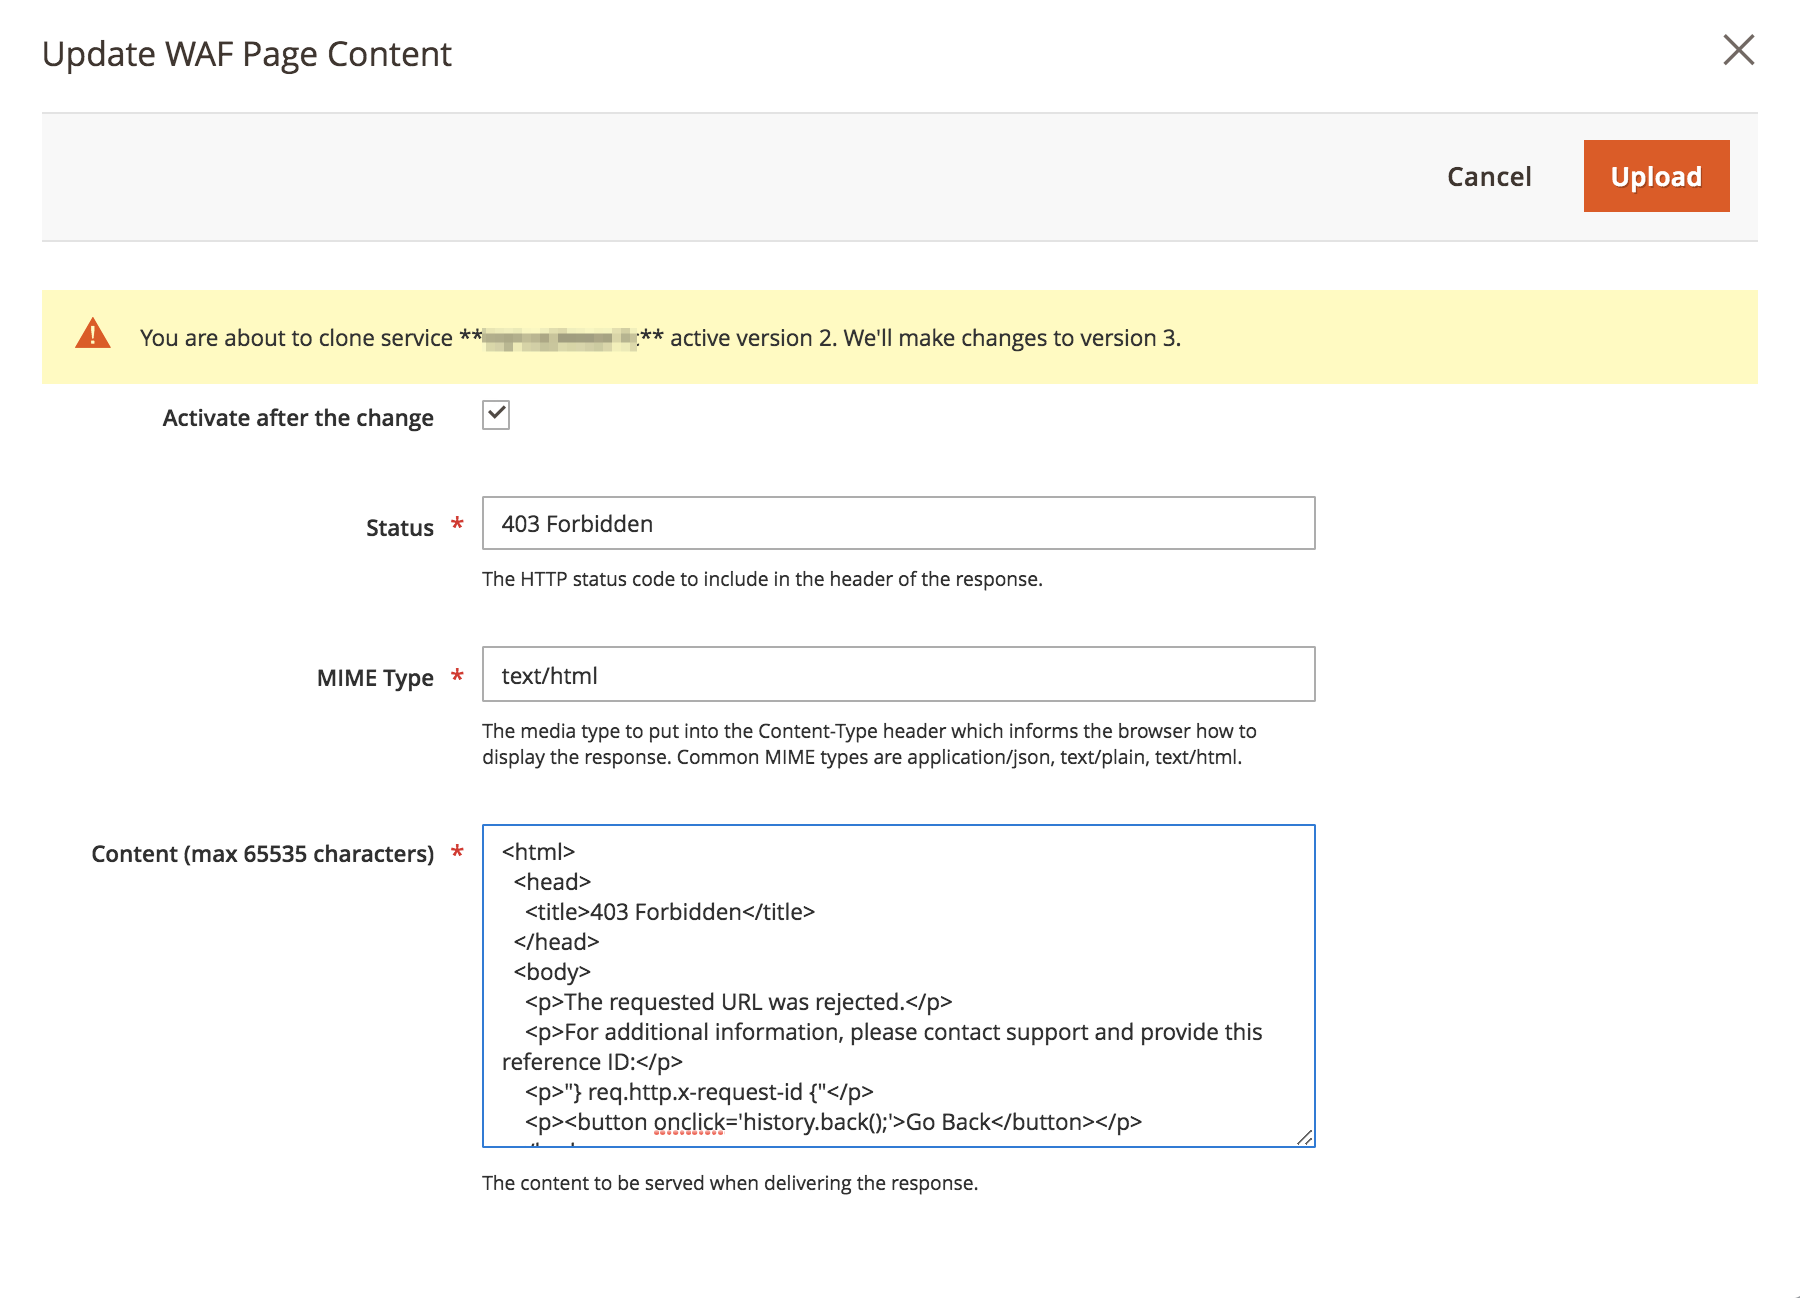
- Status — Select the
403 Forbiddenstatus. - MIME type — Type
text/html. - Content — Edit the default HTML response to add custom CSS and update the title and messaging as needed.
- Status — Select the
-
Click Upload at the top of the page to upload the customized HTML source to the Fastly server.
-
Click Save Config at the top of the page to save the updated configuration file.
-
Refresh the cache.
-
In the notification at the top of the page, click the Cache Management link.
-
On the Cache Management page, click Flush Magento Cache.
-
Display Magento error report number
By default, Fastly hides all Magento errors behind the 503 Service Unavailable error. To display the Magento error log report number so that you can find and review the error details in the logs, open the website omitting Fastly using these steps:
-
Retrieve the IP address of your store:
-
For Pro Staging and Production environments:
1
nslookup {your_project_id}.ent.magento.cloud
-
For Pro Integration environments and Starter environments:
1
nslookup gw.{your_region}.magentosite.cloud
-
-
Add your application domain and IP address to the hosts file on your local workstation:
1
{server_IP} {store_domain} -
Clear the browser cache and cookies (or switch to incognito mode).
-
Open your store website again to view the Magento error code.
-
Use the Magento error code to find the details in the error report file:
-
Locate the
./var/report/{error_number}file.