Secure access to Magento Admin UI by client IP address
The following example shows how to use a custom VCL snippet with a Fastly Access Control List (ACL) to secure access to the Magento Admin UI for a Magento Commerce Cloud project environment by client IP address. When you add the custom VCL snippet, Fastly allows only requests from IP addresses included in the ACL.
Prerequisites:
-
Configure the environment for Fastly services. See Set up Fastly.
-
Get Magento Admin UI credentials for your Magento Commerce Cloud environment.
-
List of client IP addresses allowed to access the Magento Admin UI.
Create Edge ACL for allowing client IPs
Edge ACLs create IP address lists for managing access to your site. In this example, you create an Edge ACL and add the list of client IP addresses allowed to access the Magento Admin UI for your project environment.
-
Log in to the Magento Admin UI.
-
Click Stores > Settings > Configuration > Advanced > System.
-
Expand Full Page Cache > Fastly Configuration > ACL.
-
Create the ACL container:
-
Click Add ACL.
-
On the ACL Container page, enter a ACL name—
allowlist. -
Select Activate after the change to deploy your changes to the version of the Fastly service configuration that you are editing.
-
Click Upload to attach the ACL to your Fastly service configuration.
-
-
Add the list of IP addresses allowed to access the Magento Admin UI:
-
Click the Settings icon for the
allowlistACL. -
Add and save the IP Value for each client IP address.
-
Click Cancel to return to the system configuration page.
-
-
Click Save Config.
-
Refresh the cache according to the notification at the top of the page.
Create the custom vcl snippet to secure Magento Admin UI access
The following custom VCL snippet code (JSON format) filters requests to the Magento Admin UI and allows access if the client IP address matches an address in the allowlist ACL.
Create an allowlist.json file with the following JSON content:
1
2
3
4
5
6
7
{
  "name": "allowlist",
  "dynamic": "0",
  "type": "recv",
  "priority": "5",
  "content": "if ((req.url ~ \"^/admin\") && !(client.ip ~ allowlist) && !req.http.Fastly-FF) { error 403 \"Forbidden\"; }"
}
Review the following values for the code to determine if you need to make changes:
-
name— Name for the VCL snippet. For this example,allowlist. -
priority— Determines when the VCL snippet runs. The priority is5to immediately run and check whether a Magento Admin UI requests are coming from an allowed IP address. The snippet runs before any of the default Magento VCL snippets (magentomodule_*) assigned a priority of 50. -
type— Specifies Specifies a location to insert the snippet in the versioned VCL code. This VCL is arecvsnippet type which adds the snippet code to thevcl_recvsubroutine below the default Fastly VCL code and above any objects. -
content— The snippet of VCL code to run. In this example, the code filters requests to the Magento Admin UI and allows access if the client IP address matches an address in theallowlistACL. If the address doesn’t match the request is blocked with a403 Forbiddenerror.If the URL for your Magento Admin UI was changed, replace the sample value
/adminwith the URL for your environment. For example,/company-admin.
In the code sample, the condition !req.http.Fastly-FF is important when using Origin Shielding. Do not remove or edit this code.
Add the custom VCL snippet to your Fastly service configuration from the Magento Admin UI (requires Fastly module 1.2.58 or later). If you cannot access the Magento Admin UI, save the JSON code example in a file and upload it using the Fastly API. See Creating a VCL snippet using the Fastly API.
Add the custom VCL snippet
-
Log in to the Magento Admin UI.
-
Click Stores > Settings > Configuration > Advanced > System.
-
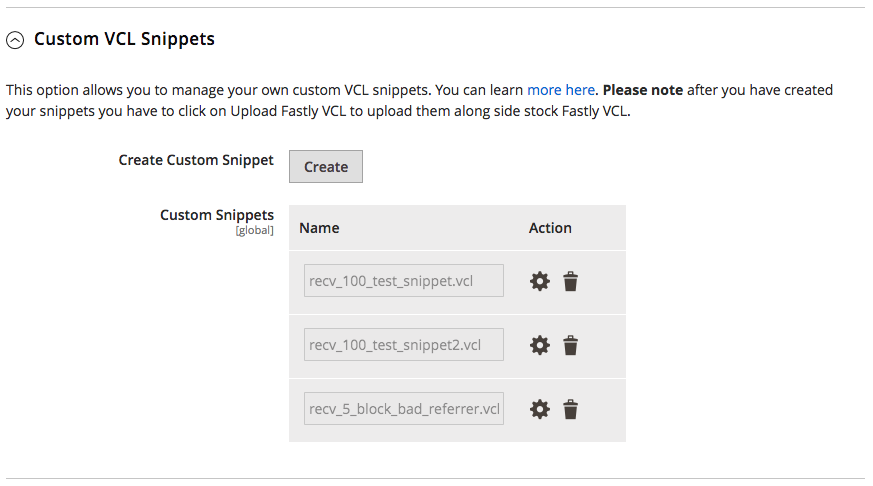
Expand Full Page Cache > Fastly Configuration > Custom VCL Snippets.
-
Click Create Custom Snippet.
-
Add the VCL snippet values:
-
Name —
allowlist -
Type —
recv -
Priority —
5 -
Add the VCL snippet content:
1
if ((req.url ~ "^/admin") && !(client.ip ~ allowlist) && !req.http.Fastly-FF) { error 403 "Forbidden";
-
-
Click Create to generate the VCL snippet file with the name pattern
type_priority_name.vcl, for examplerecv_5_allowlist.vcl -
After the page reloads, click Upload VCL to Fastly in the Fastly Configuration section to add the file to the Fastly service configuration.
-
After the upload completes, refresh the cache according to the notification at the top of the page.
Fastly validates the updated version of the VCL code during the upload process. If the validation fails, edit the custom VCL snippet to fix the issue. Then, upload the VCL again.
Modify the custom VCL snippet
-
Log in to the Magento Admin UI.
-
Click Stores > Settings > Configuration > Advanced > System.
-
Expand Full Page Cache > Fastly Configuration > Custom VCL Snippets.
-
In the Action column, click the settings icon next to the snippet to edit.
-
After the page reloads, click Upload VCL to Fastly in the Fastly Configuration section.
-
After the upload completes, refresh the cache according to the notification at the top of the page.
The Custom VCL snippets UI option shows only the snippets added through the Admin UI. You must use the Fastly API to manage custom snippets added through the API.
Delete the custom VCL snippet
You can delete custom VCL snippet code from your Fastly configuration by uploading an empty version of the snippet from the Magento Admin UI, or delete it completely using the Fastly API.
-
Upload an empty version of the snippet file to Fastly to remove the VCL logic from the active VCL version:
- Edit the snippet and delete the VCL snippet content.
- Save the configuration.
- Upload the VCL to Fastly to apply your changes.
-
Use the Fastly API Delete custom VCL snippet operation to delete the snippet completely, or submit a Magento support ticket to request deletion.
Instead of manually uploading custom VCL snippets, you can add snippets to the $MAGENTO_CLOUD_APP_DIR/var/vcl_snippets_custom directory in your environment. Snippets in this directory upload automatically when you click upload VCL to Fastly in the Magento Admin UI. See Automated custom VCL snippets deployment in the Fastly CDN for Magento 2 module documentation.