Onboarding Portal management
The Onboarding Portal gives business and technical users a central location to get started with a Magento Commerce Cloud project and environments. If you are not sure who the Project Owner is, you can check the Project Owner page in the portal. If you need to change this user, enter a Support ticket.
The Onboarding Portal is available for new accounts and projects for Starter and Pro. Existing projects cannot access the portal at this time.
Through the portal, you can:
- View your initial environment site and Magento Admin
- Add a Technical Admin, a super user to help manage your project and branches
- Create a project schedule with dates and timelines
- Access your project environments, including a link to the Project Web Interface
- (Pro) Complete the provisioning form for Staging and Production
- Get started workflow for developers to set up their local and begin developing
- Complete a quick user acceptance test (UAT) checklist with links to further tests
- Complete a checklist and submit a ticket to go live
Browse through the portal to find helpful information and options to get started with your project code and release. For additional technical information, the portal includes links to Magento Commerce Cloud DevDocs documentation.
Access the portal
Currently, access to the Onboarding Portal is available through your Magento account.
- Log in to your Magento account.
- On the Magento tab, click the Projects (Cloud) option. A list of projects associated to your account display.
- Select your project to open the Onboarding Portal.
For more technical users and developers, you can direct them to the Project Web Interface after inviting them to your project. For information on inviting and adding new users, see Manage users with the Web Interface.
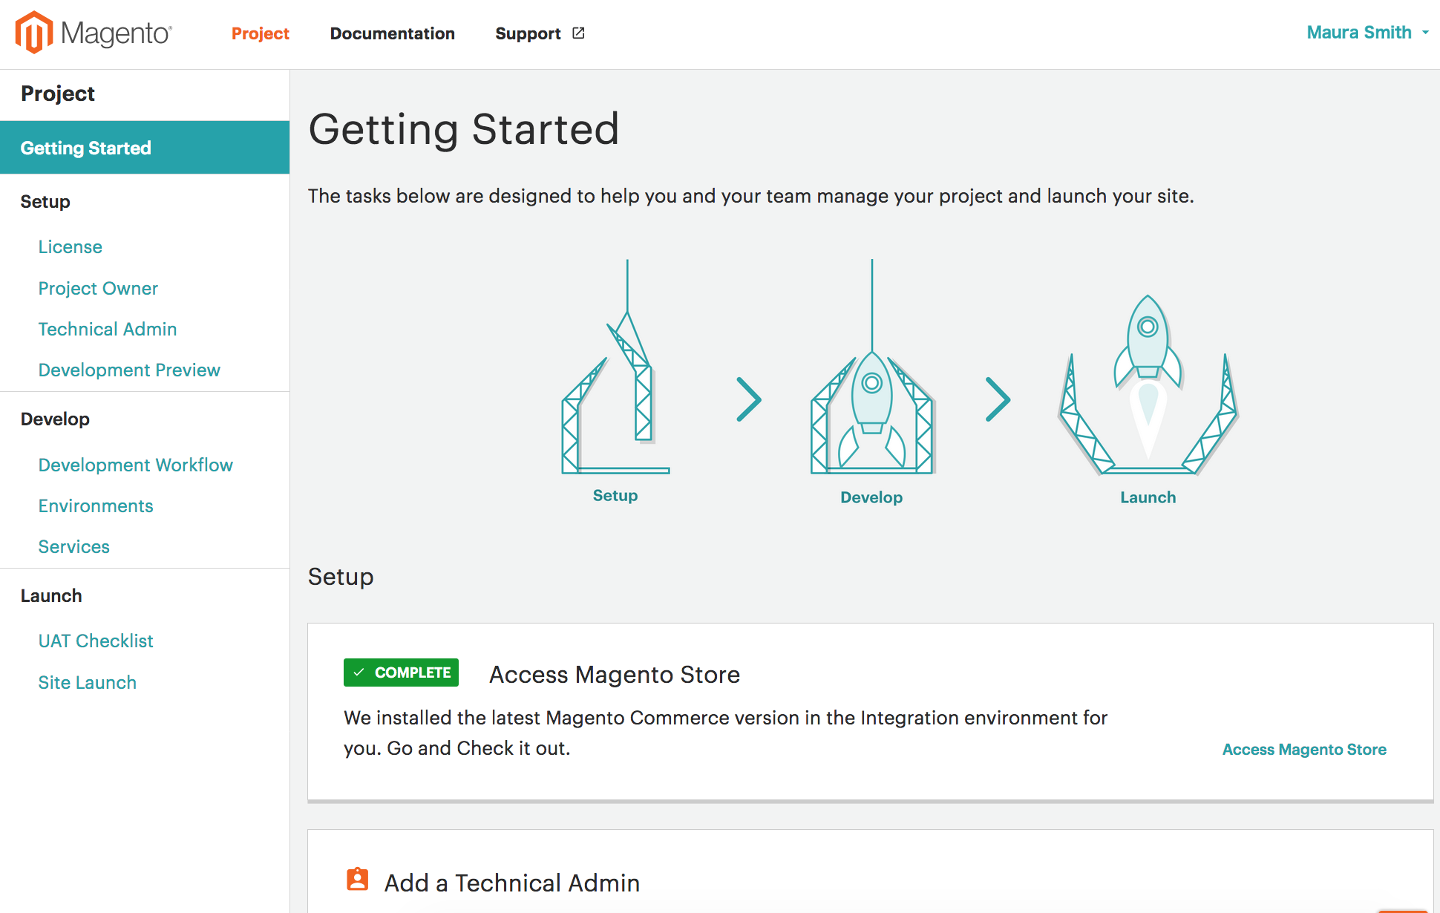
About the portal
The main page is Getting Started. It lists a series of suggested tasks from start to launch for your project. The left side navigation includes the links from the Getting Started page. If you need to enter a support ticket or manage your account, use the top navigation links.
The focus of this portal is for business users who may need a bit more planning and high level information to get started. For developers and the Technical Admin, deeper technical information and settings are available through the Project Web Interface.
Set a Technical Admin
Important: This step is required for the Project Owner.
The Technical Admin is a user account in the Project Web Interface with super user permissions. This admin is your point of contact for all technical information and project management. Managing a project includes Git code branches, adding user accounts, setting environment variables and settings, adding routes, and deploying software to environments.
The Technical Admin can be a Magento Solution Partner, a development consultant, or even yourself. In search of a development partner? Check our Magento Solution Partner network.
This user can help you create developer accounts with access to the Magento environments and code, configure technical aspects of the environments, and help with tickets with Support.
- In the Onboarding Portal, select Technical Admin from the left nav.
-
Enter the full name and email for your Technical Admin. This creates a super user account with full permissions and access across the entire project and all environments.
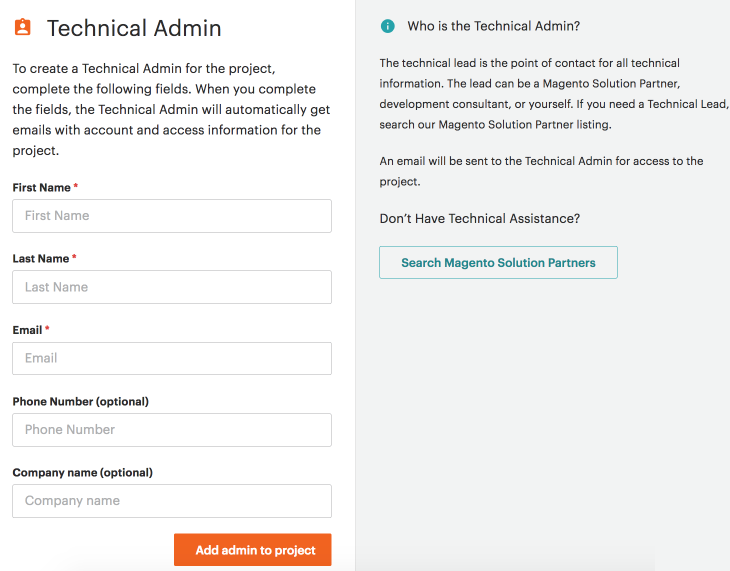
- Click Add admin to project.
Magento project ready for development
When you create an account, we immediately provision your initial environment and code using the latest released version of Magento Commerce Cloud. As part of this provisioning, you receive a project, base Git repository of the latest version code,
- For Starter: We provisioned your Master environment with cloned code in a
masterbranch. This is your Production environment that you should branch from for developing site and store code. - For Pro: We provisioned your Integration environment with cloned code in a
masterbranch. This is the origin branch of your store code. For purchased accounts, your Staging and Production environments may be provisioned earlier.
Your Technical Admin can immediately start development planning and tasks without waiting.
Get developers prepared
You may have a number of different people help create, launch, and maintain your Magento stores and sites. These include developers, designers, DBAs, and more. To better understand the process and access environments, we provide a Development section of checklists and information:
- Development Workflow: A high-level checklist for preparing your local development environment, cloning code, creating branches, and developing your store. It provides a quick walk-through for the First-time development setup information according to your Starter or Pro plan.
- Environments: Provides links and information for your Pro and Starter account environments. Every active branch of code has a complete environment to fully test new features, extensions, and integrations. This page includes direct URL links, SSH link, CLI command access, and a link into the Project Web Interface. You may want to provide the following helpful information for the development and deploy process for Starter and Pro to your developers.
- Services: Learn more about available and integrated services for your project. These services include Blackfire.io Profiler, New Relic, and Fastly. You can review and set credentials for these services through the Project Web Interface.
The technical admin, technical users, developers, and others can directly access the Project Web Interface to manage code, variables, and settings. These options are also configurable using Magento Cloud CLI commands.
Prepare to go live
When you are ready to launch your sites and stores, work through Launch options:
- UAT Checklist: A high-level checklist for verifying Magento features and your configured settings, extensions, products, and more. You can follow this checklist along with the Test deployment information.
- Site Launch: A high-level checklist for your initial “go live”. After completing the checklist, you can enter Live Site Configuration information to enter a Submit a Support ticket. You can follow this checklist along with the Go live checklist and Test deployment information.