Install, configure, verify memcached on CentOS
PHP memcache and memcached extensions
Because PHP has no native support for memcache, you must install an extension for PHP to use it. There are two PHP extensions available and it’s important to decode which to use:
-
memcache(no d), an older but very popular extension that is not maintained regularly. Thememcacheextension currently does not work with PHP 7.PHP documentation for memcache
The exact name is
php5-memcachefor Ubuntu andphp-pecl-memcachefor CentOS -
memcached(with ad), a newer and maintained extension that should be compatible with PHP 7.PHP documentation for memcached
The exact name is
php5-memcachedfor Ubuntu andphp-pecl-memcachedfor CentOS
For simplicity, we use the PHP memcache extension in this guide although we provide examples for both when configuring Magento to use memcache.
Install and configure memcached on CentOS
This section provides instructions to install memcached on CentOS and Ubuntu. For additional information, consult the memcached wiki.
We recommend using the latest stable memcached version (currently 3.1.3 for memcached).
To install memcached on CentOS, perform the following tasks as a user with root privileges:
-
Install memcached and its dependencies:
1
2
3
4
 yum -y update
 yum install -y libevent libevent-devel
 yum install -y memcached
 yum install -y php-pecl-memcache
The syntax of the preceding commands might depend on what package repositories you use. For example, if you use webtatic and PHP 5.6, enter
yum install -y php56w-pecl-memcache. Useyum search memcache|grep phpto find the appropriate package name. -
Change the memcached configuration setting for
CACHESIZEandOPTIONS:- Open
/etc/sysconfig/memcachedin a text editor. -
Locate the value for
CACHESIZEand change it to at least 1GB. For example1
CACHESIZE="1GB"
- Locate the value for
OPTIONSand change it tolocalhostor127.0.0.1
For more information about configuring memcached, see the memcached wiki.
- Open
- Save your changes to
memcachedand exit the text editor. -
Restart memcached.
1
 service memcached restart
-
Restart your web server.
For Apache,
service httpd restart - Continue with the next section.
Verify memcached works before installing Magento
We recommend testing memcached to make sure it works before you install Magento. Doing so takes only a few minutes and can simplify troubleshooting later.
Verify memcached is recognized by the web server
To verify memcached is recognized by the web server:
-
Create a
phpinfo.phpfile in the web server’s docroot:1 2 3
<?php // Show all information, defaults to INFO_ALL phpinfo();
-
Go to that page in your web browser.
For example,
http://192.0.2.1/phpinfo.php -
Make sure memcache displays as follows:
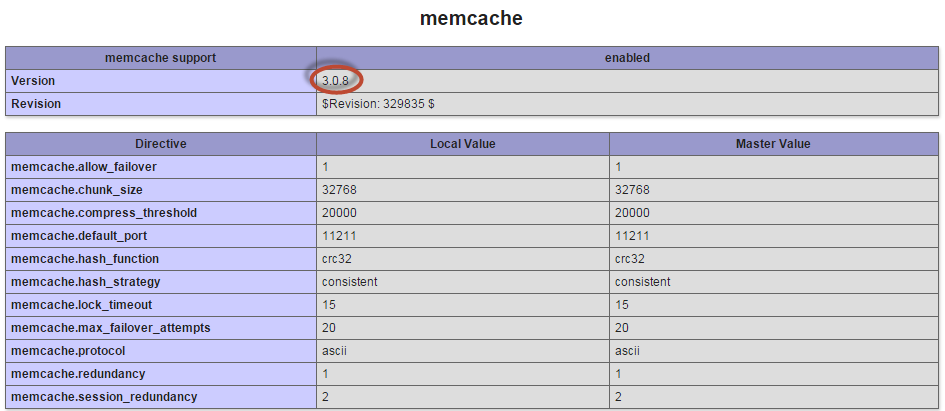
Verify you’re using memcached version 3.0.5 or later.
If memcache does not display, restart the web server and refresh the browser page. If it still does not display, verify you installed the php-pecl-memcache extension.
Create a memcache test consisting of a MySQL database and PHP script
The test uses a MySQL database, table, and data to verify you can retrieve the database data and store it in memcache. A PHP script first searches the cache. If the result does not exist, the script queries database. After the query has been fulfilled by the original database, the script stores the result in memcache, using the set command.
Create the MySQL database:
1
mysql -u root -p
At the mysql prompt, enter the following commands:
1
2
3
4
5
6
create database memcache_test;
GRANT ALL ON memcache_test.* TO memcache_test@localhost IDENTIFIED BY 'memcache_test';
use memcache_test;
create table example (id int, name varchar(30));
insert into example values (1, "new_data");
exit
Create cache-test.php in your web server’s docroot:
1
2
3
4
5
6
7
8
9
10
11
12
13
14
15
16
17
18
19
20
21
22
23
24

$meminstance = new Memcached();

$meminstance->addServer('<memcached hostname or ip>', <memcached port>);

$query = "select id from example where name = 'new_data'";
$querykey = "KEY" . md5($query);

$result = $meminstance->get($querykey);

if (!$result) {
   try {
        $dbh = new PDO('mysql:host=localhost;dbname=memcache_test','memcache_test','memcache_test');
        $dbh->setAttribute(PDO::ATTR_ERRMODE, PDO::ERRMODE_EXCEPTION);
        $result = $dbh->query("select id from example where name = 'new_data'")->fetch();
        $meminstance->set($querykey, $result, 0, 600);
        print "got result from mysql\n";
        return 0;
    } catch (PDOException $e) {
        die($e->getMessage());
    }
}
print "got result from memcached\n";
return 0;
where <memcached hostname or ip> is either localhost, 127.0.0.1, or the memcache hostname or IP address. <memcached port> is its listen port; by default, 11211.
Run the script from the command line.
1
2
cd <web server docroot>
php cache-test.php
The first result is got result from mysql. This means that the key did not exist in memcached but it was retrieved from MySQL.
The second result is got result from memcached, which verifies that the value is stored successfully in memcached.
Finally, you can view the memcache keys using Telnet:
1
telnet localhost <memcache port>
At the prompt, enter
1
stats items
The result is similar to the following:
1
2
3
4
5
6
7
STAT items:3:number 1
STAT items:3:age 1075
STAT items:3:evicted 0
STAT items:3:evicted_nonzero 0
STAT items:3:evicted_time 0
STAT items:3:outofmemory 0
STAT items:3:tailrepairs 0
Flush the memcache storage and quit Telnet:
1
2
flush_all
quit
Additional information about the Telnet test
Related topics