Using environment variables
This example shows how to set shared, system-specific, and sensitive values in your development system, then set all the values in your production system using a combination of the shared configuration, config.php, and PHP environment variables.
These configuration settings can be shared between the development and production systems:
VAT Number and Store Name from Stores > Settings > Configuration > General > General
These configuration settings are either system-specific or sensitive, as indicated:
- Send Emails To (sensitive) from Stores > Settings > Configuration > General > Contacts
- Default Email Domain (system-specific) from Stores > Settings > Configuration > Customers > Customer Configuration > Create New Account Options
You can use the same procedure to configure any settings in the following references:
- Sensitive and system-specific configuration paths reference
- Payment configuration paths reference
- Other configuration paths reference
- Magento Enterprise B2B Extension configuration paths reference
Before you begin
Before you begin, set up file system permissions and ownership as discussed in Prerequisite for your development, build, and production systems.
Assumptions
This topic provides an example of modifying the production system configuration. You can choose different configuration options if you wish.
For the purposes of this example, we assume the following:
- You use Git source control
- The development system is available in a Git remote repository named
mconfig - Your Git working branch is named
m2.2_deploy
Step 1: Set the configuration in the development system
To set the default locale and weight units in your development system:
- Log in to the Magento Admin.
- Click Stores > Settings > Configuration > General > General.
-
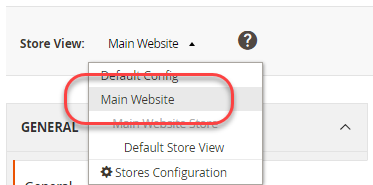
If you have more than one website available, use the Store View list in the upper left corner to switch to a different website as the following figure shows.
- In the right pane, expand Store Information.
- If necessary, clear the Use Default checkbox next to the VAT Number field.
- Enter a number in the field (for example,
12345). - In the Store Name field, enter a value (like
My Store). - Click Save Config.
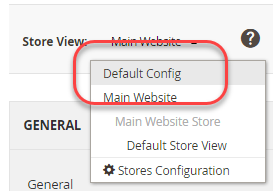
-
Use the Store View list to select the Default Config as the following figure shows.
- In the left navigation, under General, click Contacts.
- Clear the Use Default checkbox next to the Send Emails To field.
- Enter an e-mail address in the field.
- Click Save Config.
- In the left pane, click Customers > Customer Configuration.
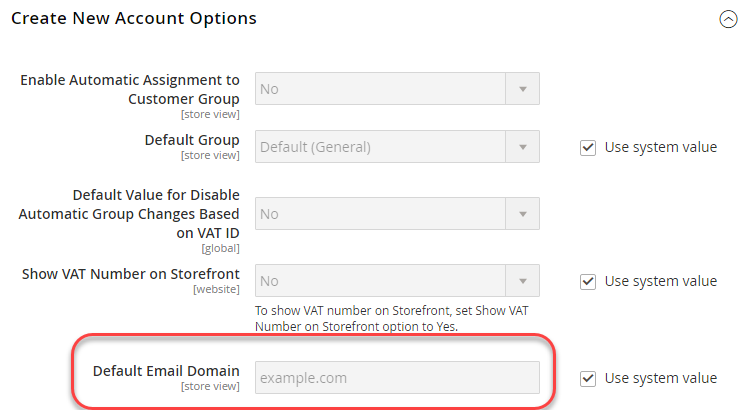
- In the right pane, expand Create New Account Options.
- Clear the Use system value checkbox next to the Default Email Domain field.
- Enter a domain name in the field.
- Click Save Config.
- If prompted, flush the cache.
Step 2: Update the configuration
Now that you’ve changed the configuration in the Magento Admin, write the shared configuration to a file as discussed in this section.
-
Log in to your development system as, or switch to, the Magento file system owner.
-
Enter the following commands in the order shown:
1
2
cd <Magento root dir>
php bin/magento app:config:dump
For example, if Magento is installed in
/var/www/html/magento2, enter:1 2
cd /var/www/html/magento2 php bin/magento app:config:dump -
If you use Git, enter the following command to confirm that
app/etc/config.phpwas updated:1
git status
You should see output similar to the following:
1
2
3
4
5
On branch m2.2_deploy
Changed but not updated:
  (use "git add <file>..." to update what will be committed)
  (use "git checkout -- <file>..." to discard changes in working directory)
       modified:   app/etc/config.php
Do not submit changes to the
generated,pub/media, orpub/staticdirectories to source control. You’ll generate those files on your build system. The development system likely has code, themes, and so on that are not ready for use on the production system. -
Check in your changes to
app/etc/config.phponly to source control.The Git command follows:
1
git add app/etc/config.php && git commit -m "Updated shared configuration" && git push mconfig m2.2_deploy
Note that even though app/etc/env.php (the system-specific configuration) was updated, don’t check it in to source control. You’ll create the same configuration settings on your production system later in this procedure.
Step 3: Update your build system and generate files
Now that you’ve committed your changes to the shared configuration to source control, you can pull those changes in your build system, compile code, and generate static files. The last step is to pull those changes to your production system.
To update your build system:
- Log in to your build system as, or switch to, the Magento file system owner.
- Change to the build system’s Magento root directory.
-
Pull the changes to
app/etc/config.phpfrom source control.The Git command follows:
1
git pull mconfig m2.2_deploy
-
Compile code:
1
php bin/magento setup:di:compile
-
After code has been compiled, generate static view files:
1
php bin/magento setup:static-content:deploy -f -
Check the changes into source control.
The Git command follows:
1
git add -A && git commit -m "Updated files on build system" && git push mconfig m2.2_deploy
Step 4: Update the production system
The last step in the process is to update your production system. You must do it in two parts:
Update the sensitive and system-specific settings
To set the sensitive and system-specific settings using environment variables, you must know the following:
-
Each setting’s scope
If you followed the instructions in Step 1, the scope for Send Emails To is global (that is, the Default Config scope) and the scope for Default Email Domain is website.
You must know the website’s code to set the Default Email Domain configuration value. See Use environment variables to override configuration settings for more information on finding it.
-
Each setting’s configuration path
The configuration paths used in this example follow:
Setting name Configuration path Send Emails To contact/email/recipient_emailDefault Email Domain customer/create_account/email_domainYou can find all sensitive and system-specific configuration paths in Sensitive and system-specific configuration paths reference.
Convert configuration paths to variable names
As discussed in Use environment variables to override configuration settings, the format of variables is:
1
<SCOPE>__<SYSTEM__VARIABLE__NAME>
The value of <SCOPE> is CONFIG__DEFAULT__ for global scope or CONFIG__WEBSITES__<WEBSITE CODE> for website scope.
To find the value of <SYSTEM__VARIABLE__NAME>, replace each / character in the configuration path with two underscores.
The variable names follow:
| Name | Config path | Variable name |
|---|---|---|
| Send Emails To | contact/email/recipient_email |
CONFIG__DEFAULT__CONTACT__EMAIL__RECIPIENT_EMAIL |
| Default Email Domain | customer/create_account/email_domain |
CONFIG__WEBSITES__BASE__CUSTOMER__CREATE_ACCOUNT__EMAIL_DOMAIN |
The preceding table has a sample website code, BASE, for the Default Email Domain configuration setting. Replace BASE with the appropriate website code for your store.
Set the variables using environment variables
You can set the variable values in the Magento index.php using the following format:
1
$_ENV['VARIABLE'] = 'value';
To set variable values:
- Log in to your production system as, or switch to, the Magento file system owner.
- Open
<Magento root dir>/index.phpin a text editor. -
Anywhere in
index.php, set values for the variables similar to the following:1 2
$_ENV['CONFIG__DEFAULT__CONTACT__EMAIL__RECIPIENT_EMAIL'] = 'myname@example.com'; $_ENV['CONFIG__WEBSITES__BASE__CUSTOMER__CREATE_ACCOUNT__EMAIL_DOMAIN'] = 'magento.com';
- Save your changes to
index.phpand exit the text editor. - Continue with the next section.
Update the shared settings
This section discusses how to pull all the changes you made on your development and build systems, which updates the shared configuration settings (Store Name and VAT Number).
To update the production system:
- Log in to your production system as, or switch to, the Magento file system owner.
-
Start maintenance mode:
1
cd <Magento root dir>
1
php bin/magento maintenance:enable
For additional options, such as the ability to set an IP address whitelist, see
magento maintenance:enable. -
If you use Magento Commerce, stop queue workers. TBD
-
Pull code from source control.
The Git command follows:
1
git pull mconfig m2.2_deploy
-
Update the configuration:
1
php bin/magento app:config:import
-
Clean the cache:
1
php bin/magento cache:clean
-
End maintenance mode:
1
php bin/magento maintenance:disable
Verify configuration settings in the Magento Admin
This section discusses how you can verify the configuration settings in your production system Admin.
To verify the configuration settings:
- Log in to your production system’s Magento Admin.
- Click Stores > Settings > Configuration > General > General.
-
Use the Store View list in the upper left corner to switch to a different website.
The shared configuration options you set in the development system are displayed similar to the following.
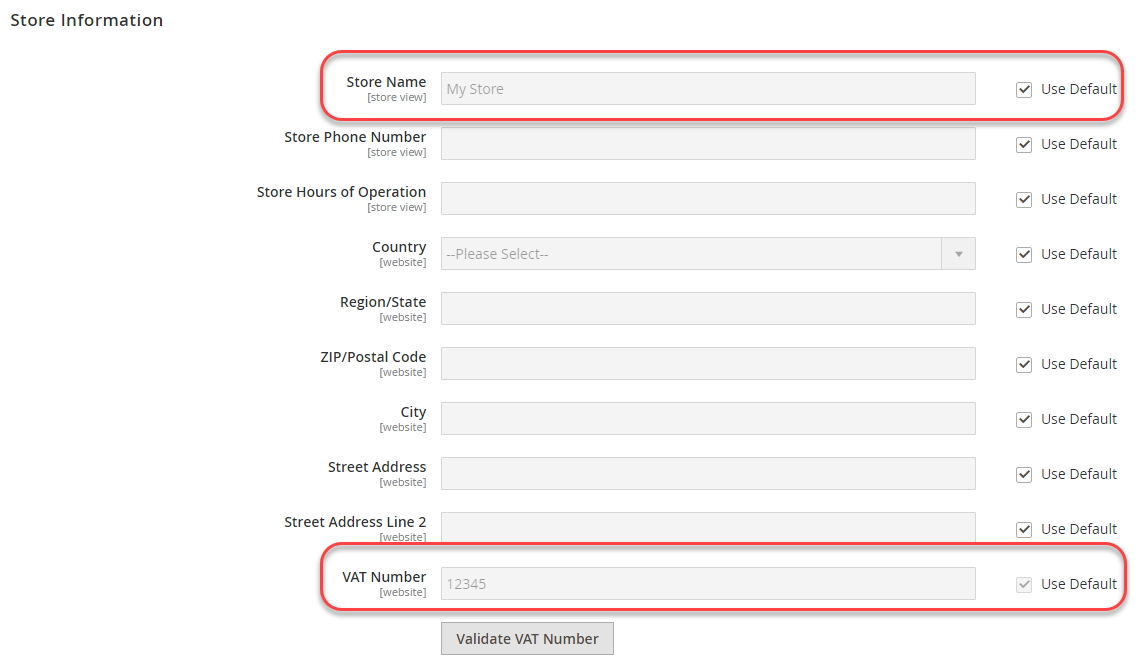
The Store Name field is editable in the website scope but if you switch to the Default Config scope, it is not editable. This is the result of how you set the options in the development system. The value of VAT Number is not editable in website scope.
- If you haven’t already done so, switch to Default Config scope.
-
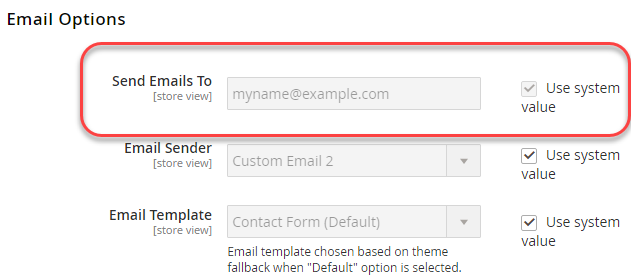
In the left navigation, under General, click Contacts.
The Send Emails To field is not editable, as the following figure shows. This is a sensitive setting.
- In the left pane, click Customers > Customer Configuration.
-
In the right pane, expand Create New Account Options.
The value of the Default Email Domain field is displayed as follows. This is a system-specific setting.