Configure Magento to use Elasticsearch
This section discusses the minimum settings you must choose to test Elasticsearch with Magento 2. For additional details about configuring Elasticsearch, see the Magento Commerce User Guide.
Magento 2.3.1 adds support for Elasticsearch 6.x, and it is enabled by default. Magento still provides modules for Elasticsearch 2.x and 5.x, but these must be enabled in order to use these versions. Elasticsearch 2.x is still available but strongly discouraged. Versions 2.x and 5.x are End of Life. If you must run Elasticsearch 2.x or 5.x with Magento 2.3.1, you must downgrade the Elasticsearch client to an older version. Follow the instructions in Change the Elasticsearch Client.
Configure Elasticsearch within Magento
To configure Magento to use Elasticsearch:
- Log in to the Magento Admin as an administrator.
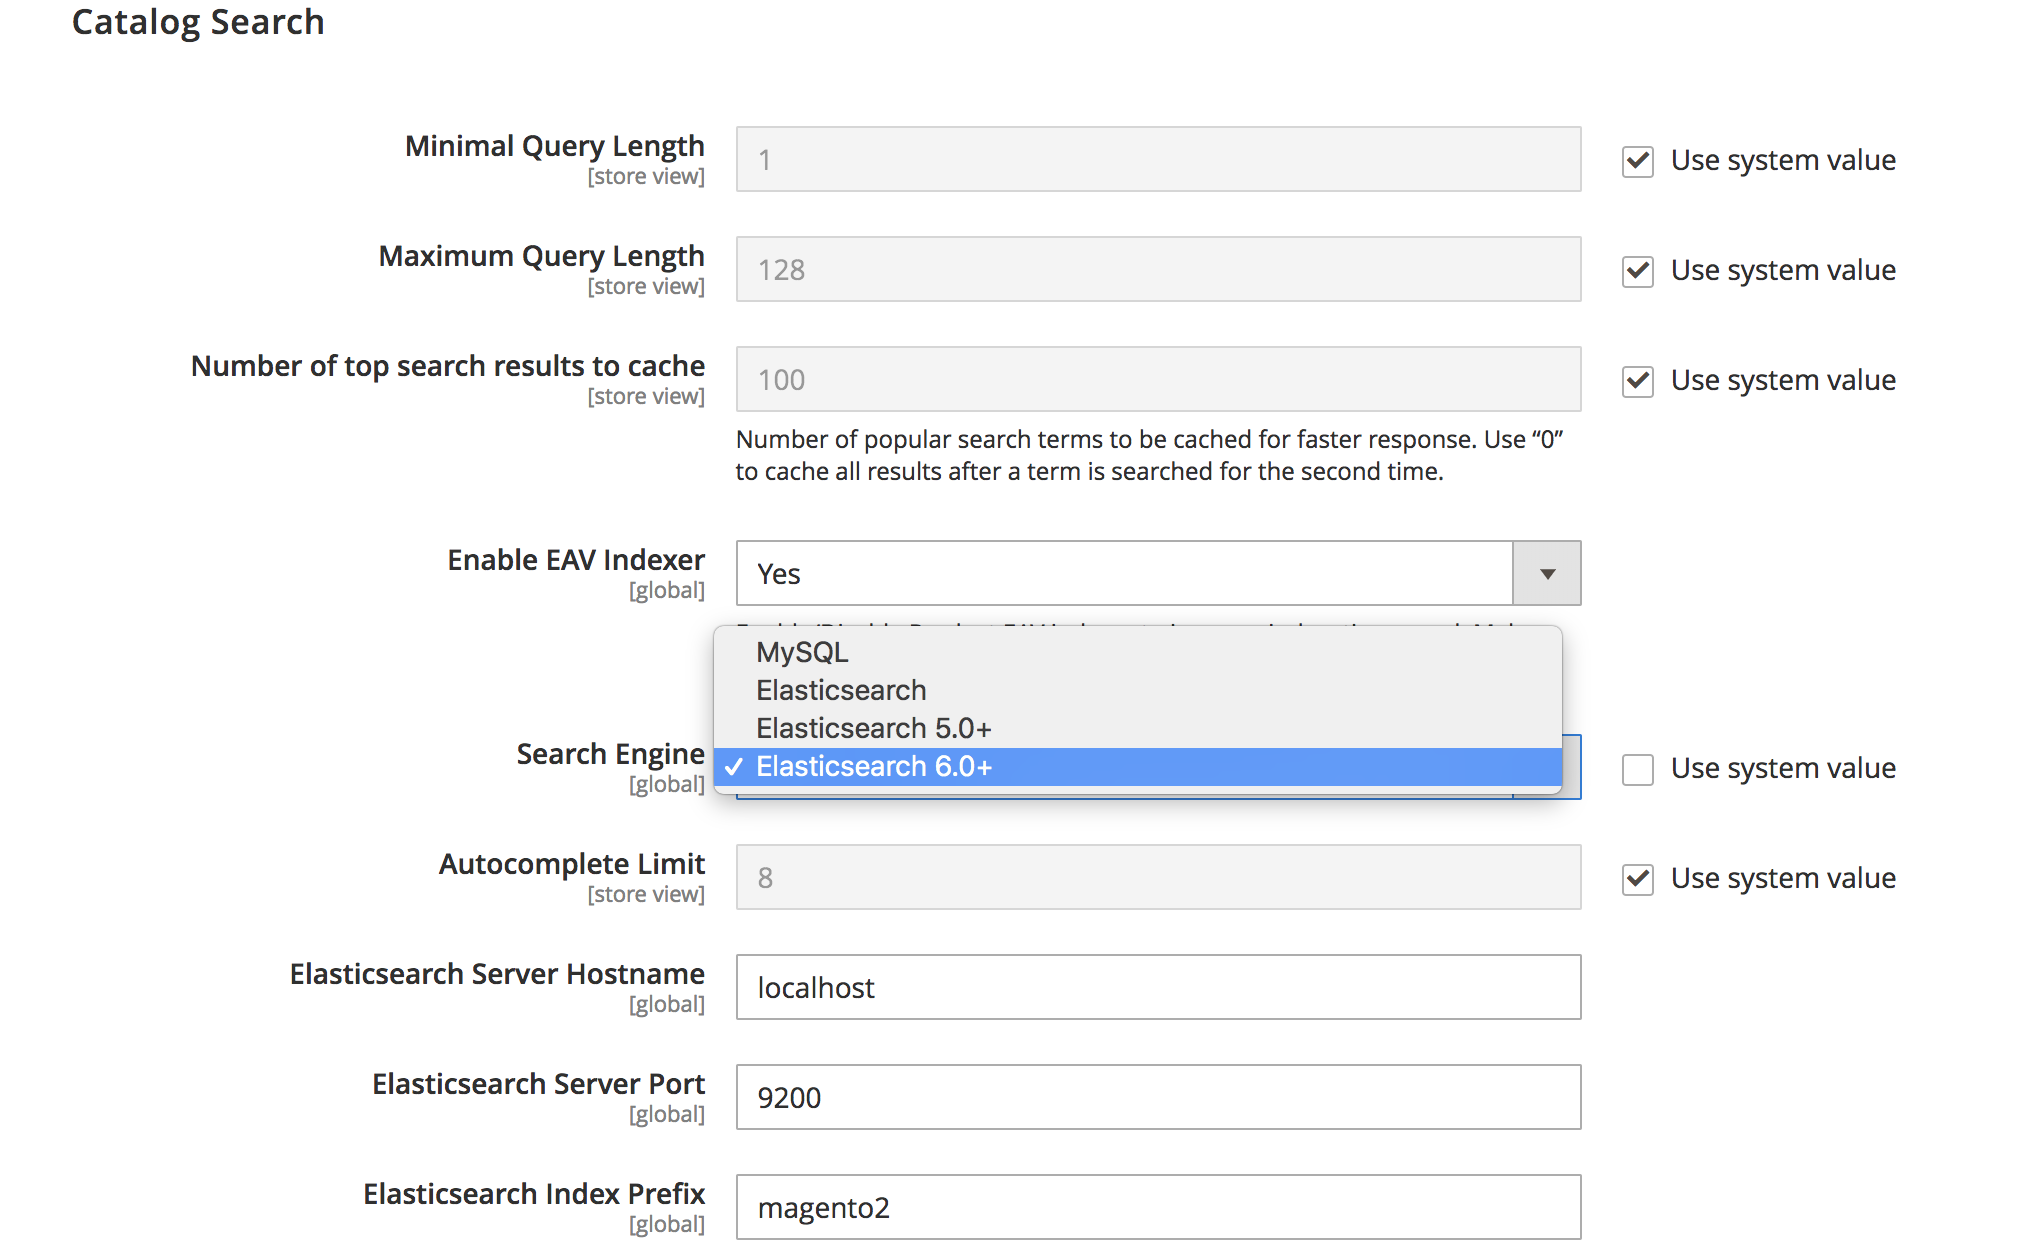
- Click Stores > Settings > Configuration > Catalog > Catalog > Catalog Search.
- From the Search Engine list, select the correct Elasticsearch version as the following figure shows. (The Elasticsearch 5.0+/6.0+ options are not available for Magento 2.1.)
The following table lists the required configuration options to configure and test the connection with Magento. Unless you changed Elasticsearch server settings, the defaults should work. Skip to the next step.
| Option | Description |
|---|---|
| Elasticsearch Server Hostname | Enter the fully qualified hostname or IP address of the machine running Elasticsearch. Magento Commerce Cloud: Get this value from your integration system. |
| Elasticsearch Server Port | Enter the Elasticsearch web server proxy port. In our example, the port is 8080 but if you are using a secure proxy, it is typically 443. Magento Commerce Cloud: Get this value from your integration system. |
| Elasticsearch Index Prefix | Enter the Elasticsearch index prefix. If you use a single Elasticsearch instance for more than one Magento installation (Staging and Production environments), you must specify a unique prefix for each installation. Otherwise, you can use the default prefix magento2. |
| Enable Elasticsearch HTTP Auth | Click Yes only if you enabled authentication for your Elasticsearch server. If so, provide a username and password in the provided fields. |
- Click Test Connection.
You will see either:

Continue with:
or you will see:

If so, try the following:
- Make sure the Elasticsearch server is running.
- If the Elasticsearch server is on a different host from Magento, log in to the Magento server and ping the Elasticsearch host. Resolve network connectivity issues and test the connection again.
- Examine the command window in which you started Elasticsearch for stack traces and exceptions. You must resolve those before you continue. In particular, make sure you started Elasticsearch as a user with
rootprivileges. - Make sure that UNIX firewall and SELinux are both disabled, or set up rules to enable Elasticsearch and Magento to communicate with each other.
- Verify the value of the Elasticsearch Server Hostname field. Make sure the server is available. You can try the server’s IP address instead.
- Use the command
netstat -an | grep **listen-port**command to verify that the port specified in the Elasticsearch Server Port field is not being used by another process.
For example, to see if Elasticsearch is running on its default port, use the following command:
1
  netstat -an | grep 9200
If Elasticsearch is running on port 9200, it displays similar to the following:
tcp 0 0 :::9200 :::* LISTEN
Reindexing catalog search and refreshing the full page cache
After you change Magento’s Elasticsearch configuration, you must reindex the catalog search index and refresh the full page cache using the Admin or command line.
To refresh the cache using the Admin:
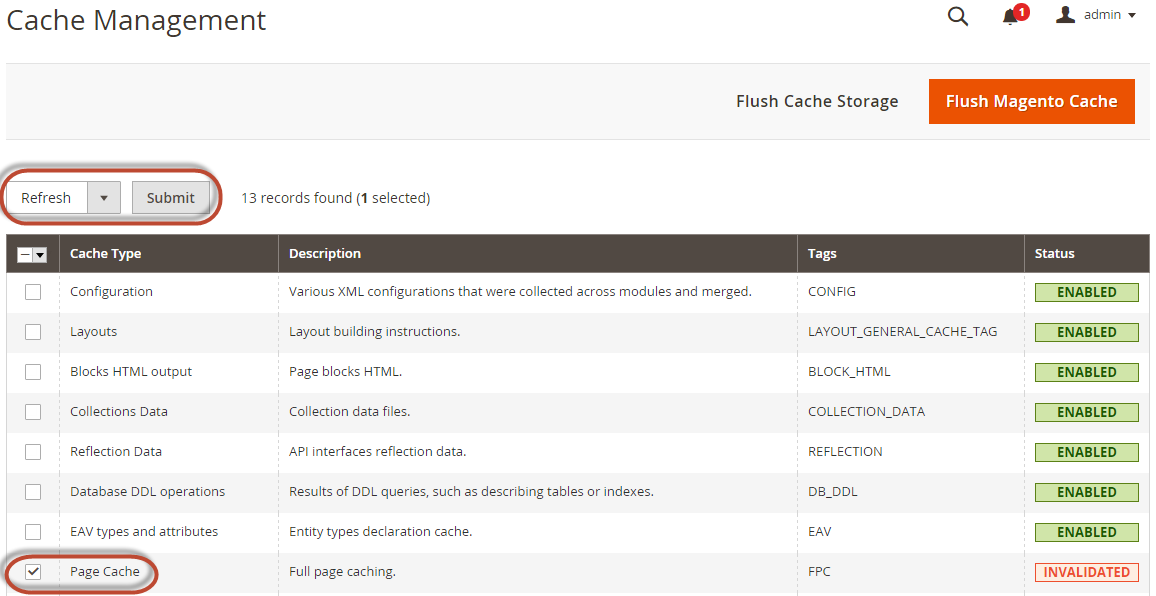
- In the Admin, click System > Cache Management.
- Select the checkbox next to Page Cache.
- From the Actions list in the upper right, click Refresh.
The following figure shows an example.
To clean the cache using the command line, use the magento cache:clean command.
To reindex using the command line:
- Log in to your Magento server as, or switch to, the Magento file system owner.
- Enter any of the following commands:
Enter the following command to reindex the catalog search index only:
1
bin/magento indexer:reindex catalogsearch_fulltext
Enter the following command to reindex all indexers:
1
bin/magento indexer:reindex
- Wait until reindexing completes.
Unlike the cache, indexers are updated by a cron job. Make sure cron is enabled before you start using Elasticsearch.