Installation quick reference (tutorial)
We know it is challenging to install the Magento software. We would like to help you by simplifying the process as much as possible.
This topic assumes:
- You have your own Magento server (you are not using a shared hosting provider).
- You are starting the installation using
composer create-project, which enables you to get the most recent Magento software and to add your own customizations to it, if desired. - Everything is installed on one host (database, web server, and so on).
-
The host you are installing on is either Ubuntu or CentOS.
(You can use the same instructions to install on other UNIX distributions like RedHat Enterprise Linux or Debian, but Magento is not supported on Mac or Windows.)
- Your host’s IP address is
192.0.2.5.
This is just an example IP address that you will see in detailed examples throughout this topic. You can substitute it with whatever internal/external IP address matches your server.
-
You are installing to the
magento2subdirectory under your web server’s docroot (full path is/var/www/html/magento2)You can optionally set up static routing or a virtual host to install to a hostname instead of an IP but that is beyond the scope of this topic.
We have broken the installation process into three main parts: getting started, installing, and post-installation. We hope that what follows helps you; if you would like to suggest improvements, click Edit this page on GitHub at the top of this page and let us know.
Precondition: How advanced are you?
Do you know what a “terminal” application is? Do you know what operating system your server runs? Do you know what Apache is?
If not, see the Installation overview.
Installation part 1: Getting started
- See the system requirements.
-
If your system lacks any requirements, see the prerequisites documentation:
- Just as importantly, set up the Magento file system owneron the server.
- Switch to the Magento file system owner.
Get the Magento software
When all prerequisites have been met, get the Magento software using Composer as follows:
1
cd <web server docroot directory>
1
composer create-project --repository=https://repo.magento.com/ magento/project-community-edition magento2
You are required to authenticate; see Get your authentication keys for details. This downloads Magento code only; it does not install the software for you.
Alternatively, you can also download a Magento software archive.
Set pre-installation file system ownership and permissions
This topic discusses how to set read-write permissions for the web server group before you install the Magento software. This is necessary so the Setup Wizard or command line can write files to the Magento file system.
The procedure you use is different, depending on whether you use shared hosting and have one user or if you use a private server and have two users.
If you’re using a Magento version earlier than 2.0.6, see Appendix—Magento file system ownership and appendix (legacy) instead.
Set permissions for shared hosting (one user)
This section discusses how to set pre-installation permissions if you log in to the Magento server as the same user that also runs the web server. This type of setup is common in shared hosting environments.
To set permissions before you install the Magento software:
- Log in to your Magento server.
-
Use a file manager application provided by your shared hosting provider to verify write permissions are set on the following directories:
vendor(Composer or compressed archive installation)app/etcpub/staticvargenerated- Any other static resources
-
If you have command-line access, enter the following commands in the order shown:
1
cd <magento_root>
1
find var generated vendor pub/static pub/media app/etc -type f -exec chmod u+w {} +
1
find var generated vendor pub/static pub/media app/etc -type d -exec chmod u+w {} +
1
chmod u+x bin/magento
To optionally enter all commands on one line, enter the following assuming Magento is installed in /var/www/html/magento2:
1
cd /var/www/html/magento2 && find var generated vendor pub/static pub/media app/etc -type f -exec chmod u+w {} + && find var generated vendor pub/static pub/media app/etc -type d -exec chmod u+w {} + && chmod u+x bin/magento
-
If you haven’t done so already, get the Magento software in one of the following ways:
-
After you have set file system ownership and permissions, continue with any of the following:
To further restrict permissions after installing the Magento software, you configure a Magento umask.
Set ownership and permissions for two users
This section discusses how to set ownership and permissions for your own server or a private hosting setup. In this type of setup, you typically cannot log in as, or switch to, the web server user. You typically log in as one user and run the web server as a different user.
Complete the following tasks in the order shown:
- About the shared group
- Step 1: Create the Magento file system owner and give the user a strong password
- Step 2: Find the web server group
- Step 3: Put the Magento file system owner in the web server’s group
- Step 4: Get the Magento software
- Step 5: Set ownership and permissions for the shared group
About the shared group
To enable the web server to write files and directories in the Magento file system but to also maintain ownership by the Magento file system owner, both users must be in the same group. This is necessary so both users can share access to Magento files (including files created using the Magento Admin or other web-based utilities).
This section discusses how to create a new Magento file system owner and put that user in the web server’s group. You can use an existing user account if you wish; we recommend the user have a strong password for security reasons.
Skip to step 2 if you plan on using an existing user account.
Step 1: Create the Magento file system owner and give the user a strong password
This section discusses how to create the Magento file system owner. (Magento file system owner is another term for the command-line user.)
To create a user on CentOS or Ubuntu, enter the following command as a user with root privileges:
1
adduser <username>
To give the user a password, enter the following command as a user with root privileges:
1
passwd <username>
Follow the prompts on your screen to create a password for the user.
If you don’t have root privileges on your Magento server, you can use another local user account. Make sure the user has a strong password and continue with Put the Magento file system owner in the web server group.
For example, to create a user named magento_user and give the user a password, enter:
1
sudo adduser magento_user
1
sudo passwd magento_user
Because the point of creating this user is to provide added security, make sure you create a strong password.
Step 2: Find the web server user’s group
To find the web server user’s group:
- CentOS:
1
grep -E -i '^user|^group' /etc/httpd/conf/httpd.conf
1
or
1
grep -Ei '^user|^group' /etc/httpd/conf/httpd.conf
Typically, the user and group name are both apache.
- Ubuntu:
ps aux | grep apacheto find the apache user, thengroups <apache user>to find the group.
Typically, the username and the group name are both www-data.
Step 3: Put the Magento file system owner in the web server’s group
To put the Magento file system owner in the web server’s primary group (assuming the typical Apache group name for CentOS and Ubuntu), enter the following command as a user with root privileges:
- CentOS:
usermod -a -G apache <username> - Ubuntu:
usermod -a -G www-data <username>
The -a -G options are important because they add apache or www-data as a secondary group to the user account, which preserves the user’s primary group. Adding a secondary group to a user account helps restrict file ownership and permissions to ensure members of a shared group only have access to certain files.
For example, to add the user magento_user to the apache primary group on CentOS:
1
sudo usermod -a -G apache magento_user
To confirm your Magento user is a member of the web server group, enter the following command:
1
groups magento_user
The following sample result shows the user’s primary (magento) and secondary (apache) groups.
1
magento_user : magento_user apache
Typically, the username and primary group name are the same.
To complete the task, restart the web server:
- Ubuntu:
service apache2 restart - CentOS:
service httpd restart
Step 4: Get the Magento software
If you haven’t done so already, get the Magento software in one of the following ways:
Step 5: Set ownership and permissions for the shared group
To set ownership and permissions before you install the Magento software:
- Log in to your Magento server as, or switch to, the Magento file system owner.
- Enter the following commands in the order shown:
1
cd <magento_root>
1
find var generated vendor pub/static pub/media app/etc -type f -exec chmod g+w {} +
1
find var generated vendor pub/static pub/media app/etc -type d -exec chmod g+ws {} +
1
chown -R :<web server group> .
1
chmod u+x bin/magento
To optionally enter all commands on one line, enter the following assuming Magento is installed in /var/www/html/magento2 and the web server group name is apache:
1
cd /var/www/html/magento2 && find var generated vendor pub/static pub/media app/etc -type f -exec chmod g+w {} + && find var generated vendor pub/static pub/media app/etc -type d -exec chmod g+ws {} + && chown -R :apache . && chmod u+x bin/magento
In the event file system permissions are set improperly and can’t be changed by the Magento file system owner, you can enter the command as a user with root privileges:
1
cd /var/www/html/magento2 && sudo find var generated vendor pub/static pub/media app/etc -type f -exec chmod g+w {} + && sudo find var generated vendor pub/static pub/media app/etc -type d -exec chmod g+ws {} + && sudo chown -R :apache . && sudo chmod u+x bin/magento
Next step
After you have set file system ownership and permissions, continue with any of the following:
Switch to the Magento file system owner
After you’ve performed the other tasks in this topic, enter one of the following commands to switch to that user:
- Ubuntu:
su <username> - CentOS:
su - <username>
For example,
1
su magento_user
Installation part 2: Installing the Magento software
You can choose to install the Magento software using either a web-based Setup Wizard or using the command line.
Command line installation
The following example shows how to install using the command line with the following options:
- The Magento software is installed in the
/var/www/html/magento2directory, which means your storefront URL ishttp://192.0.2.5/magento2/ -
The database server is on the same host as the web server.
The database name is
magento, and the username and password are bothmagento - Uses server rewrites
-
The Magento administrator has the following properties:
- First and last name are
Magento User - Username is
adminand the password isadmin123 - E-mail address is
user@example.com
- First and last name are
- Default language is
en_US(U.S. English) - Default currency is U.S. dollars
-
Default time zone is U.S. Central (America/Chicago)
1
2
3
4
5
 bin/magento setup:install --base-url=http://192.0.2.5/magento2/ \
 --db-host=localhost --db-name=magento --db-user=magento --db-password=magento \
 --admin-firstname=Magento --admin-lastname=User --admin-email=user@example.com \
 --admin-user=admin --admin-password=admin123 --language=en_US \
 --currency=USD --timezone=America/Chicago --use-rewrites=1
Optionally switch to developer mode.
1
cd <magento_root>/bin
1
php magento deploy:mode:set developer
Web Setup Wizard
The following example shows how to install using the Web Setup Wizard with the following options:
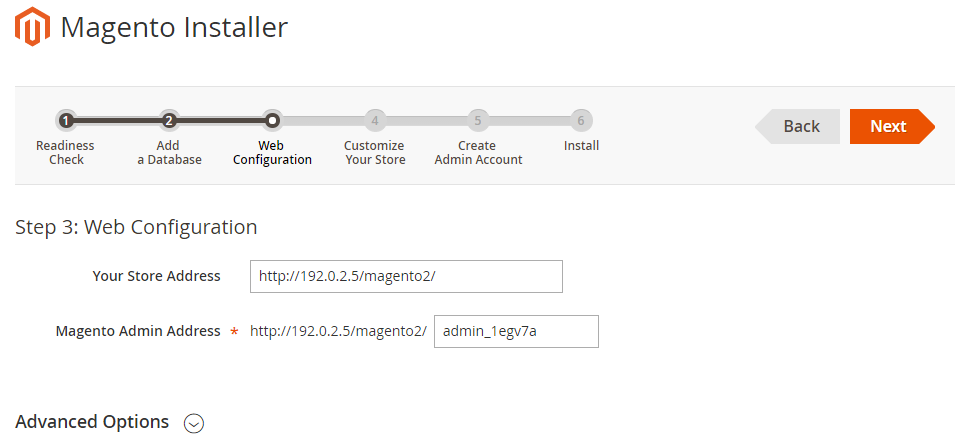
- The Magento software is installed in the
magento2directory relative to the web server docroot, which means your storefront URL ishttp://192.0.2.5/magento2/ -
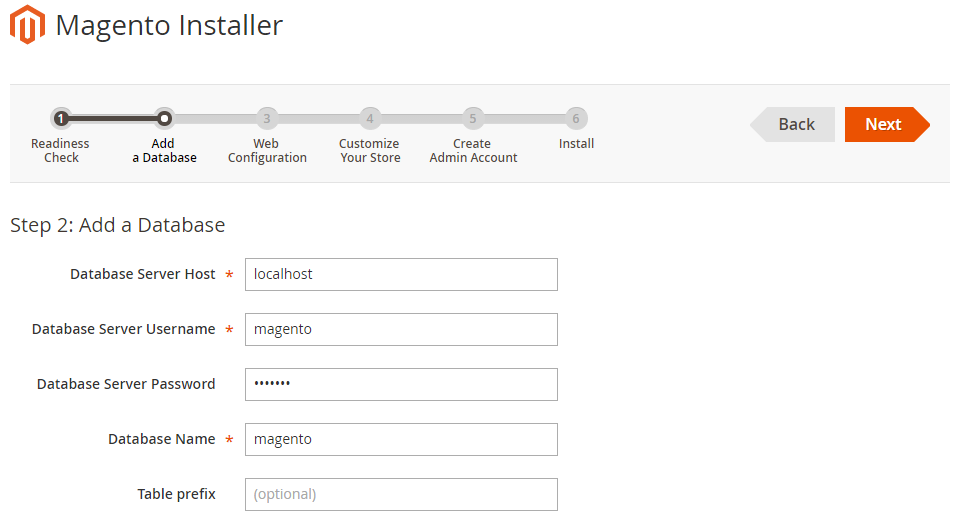
The database server is on the same host as the web server.
The database name is
magento, and the username and password are bothmagento -
The Magento administrator has the following properties:
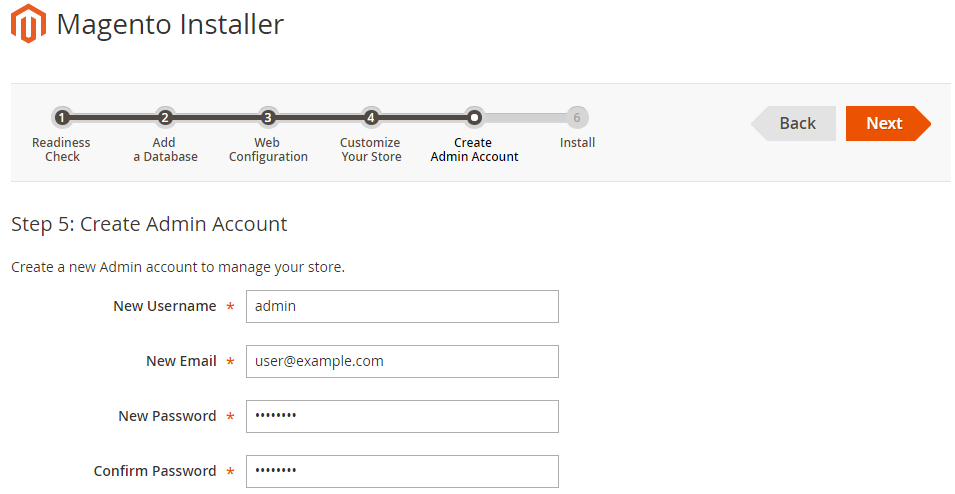
- Username is
adminand the password isadmin123 - E-mail address is
user@example.com
- Username is
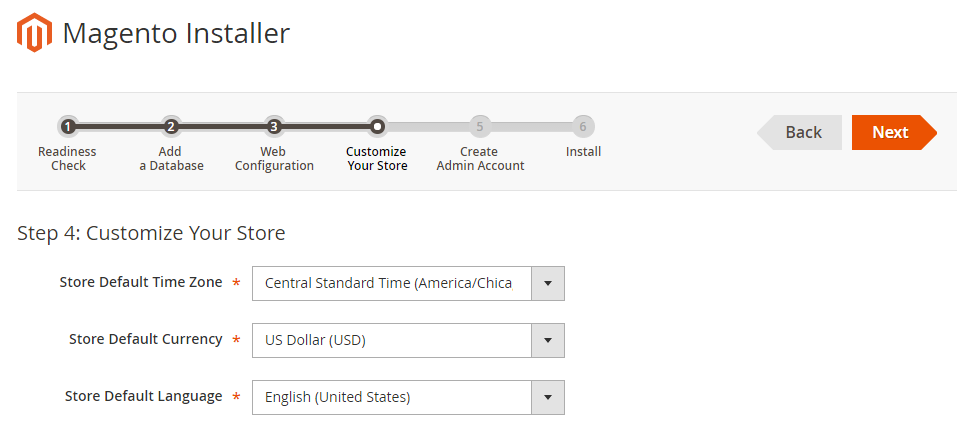
- Default language is
en_US(U.S. English) - Default currency is U.S. dollars
- Default time zone is U.S. Central (America/Chicago)
To run the Web Setup Wizard:
-
Enter the following URL in your browser’s address or location field:
http://192.0.2.5/magento2/setup
-
At the welcome page, click Agree and Setup Magento.
You must accept the license agreement to install the Magento software
-
Readiness Check verifies your system is ready to install the Magento software.
Click Start Readiness Check

- If the readiness check passes, click Next and continue with the next step.
- If the readiness check fails, see [Readiness check issues][]
- If the readiness check passes, click Next and continue with the next step.
- If the readiness check fails, see Readiness check issues
-
Step 2: Add a Database enables you to set up your Magento database.
-
Web Configuration enables you to enter the storefront and Magento Admin URLs.
-
Customize Your Store enables you to enter a default store currency, time zone, and language.
-
Create Admin Account enables you to set up a Magento administrator. This user can perform all actions in the Magento Admin.
-
Install starts the installation when you click Install Now.
You can optionally expand Console Log to see installation messages while the installation is in progress.
Installation part 3: Post-installation
- Verify the installation was successful.
- Learn about the Component Manager and System Upgrade for future updates.