Creating a Magento admin page
Overview
This tutorial gives instructions for the creation of a module that displays a simple page in the Magento admin.
For the purposes of this tutorial ‘MyCompany’ is the name of the company associated with a module named ExampleAdminNewPage.
Working directory
Start by creating the working directory for all the module files.
In your Magento development environment under the app/code directory, run the following command:
1
mkdir -p MyCompany/ExampleAdminNewPage
This command creates the MyCompany company directory and the ExampleAdminNewPage module directory. The latter will be the root directory for the module we will create.
Initial boilerplate files
These initial boilerplate files are the bare essential files needed for any Magento module.
composer.json
In the module’s root directory, create the file composer.json. This file gives composer the ability to install this module and its dependencies.
For more information see: composer.json.
1
2
3
4
5
6
7
8
9
10
11
12
13
14
15
16
17
18
19
  {
    "name": "mycompany/sample-module-minimal",
    "description": "A module that creates a page in the Magento admin area",
    "type": "magento2-module",
    "version": "1.0.0",
    "license": [
      "OSL-3.0",
      "AFL-3.0"
    ],
    "require": {
      "php": "~5.6.0|7.0.2|7.0.4|~7.0.6"
    },
    "autoload": {
      "files": [ "registration.php" ],
      "psr-4": {
        "MyCompany\\ExampleAdminNewPage\\": ""
      }
    }
  }
registration.php
In the module’s root directory, create the file registration.php. This file registers the module MyCompany_ExampleAdminNewPage with Magento.
For more information see: registering your component.
1
2
3
4
5
6
  <?php
  \Magento\Framework\Component\ComponentRegistrar::register(
      \Magento\Framework\Component\ComponentRegistrar::MODULE,
      'MyCompany_ExampleAdminNewPage',
      __DIR__
  );
etc/module.xml
In the module’s root directory, create a new directory called etc. Under that directory, create the file module.xml. This file specifies the name and setup version of this module.
For more information see: naming your component.
1
2
3
4
5
<?xml version="1.0"?>
<config xmlns:xsi="http://www.w3.org/2001/XMLSchema-instance" xsi:noNamespaceSchemaLocation="urn:magento:framework:Module/etc/module.xsd">
  <module name="MyCompany_ExampleAdminNewPage">
  </module>
</config>
If your module does not implement Declarative Schema, define the setup_version attribute in the module element.
1
<module name="MyCompany_ExampleAdminNewPage" setup_version="1.0.0">
Routing and navigation
Before we can view the module’s page, we need a way to navigate to it. These files create a link to the page in the left navigation and tells Magento how to resolve requests for that page.
For more information on this topic, see: routing.
etc/adminhtml/menu.xml
Under the created etc directory, create a new directory called adminhtml. Under that directory, create the file menu.xml. This XML file adds new menu items to the Magento admin.
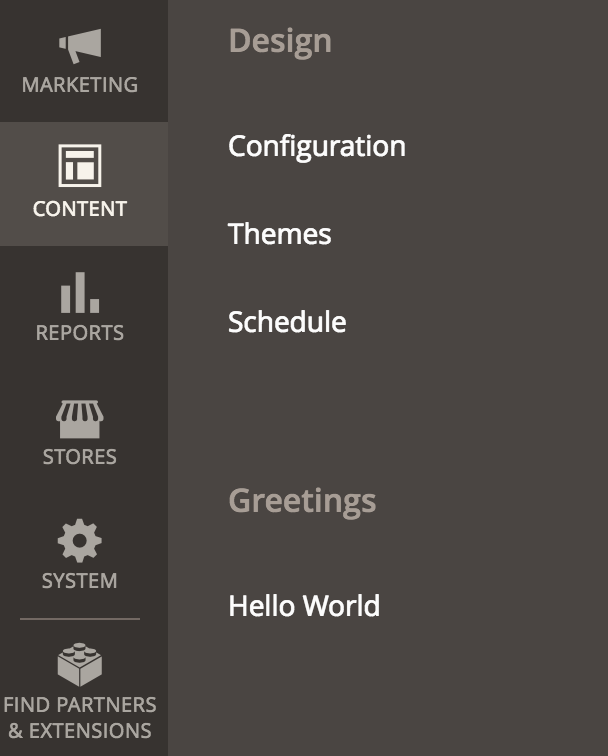
The menu.xml file provided below adds two items in the Content section of the left navigation:
- A new separate section with the title Greetings under Content.
- A link with the label Hello World that leads to a page request for
exampleadminnewpage/helloworld/indexunderneath that new section.
The following parts make up the generated page request link to the Hello World page:
exampleadminnewpage- This is thefrontName. Because its purpose is to help route requests to the correct module, we give it the same name as the module, but this is not required.helloworld- This specifies the name of the controller to use.index- In the XML file, since the action for the controller is not specified, Magento uses the default valueindex.
1
2
3
4
5
6
7
<?xml version="1.0"?>
<config xmlns:xsi="http://www.w3.org/2001/XMLSchema-instance" xsi:noNamespaceSchemaLocation="urn:magento:module:Magento_Backend:etc/menu.xsd">
    <menu>
      <add id="MyCompany_ExampleAdminNewPage::greetings" title="Greetings" translate="title" module="MyCompany_ExampleAdminNewPage" parent="Magento_Backend::content" sortOrder="50" dependsOnModule="MyCompany_ExampleAdminNewPage" resource="MyCompany_ExampleAdminNewPage::greetings"/>
      <add id="MyCompany_ExampleAdminNewPage::greetings_helloworld" title="Hello World" translate="title" module="MyCompany_ExampleAdminNewPage" parent="MyCompany_ExampleAdminNewPage::greetings" sortOrder="10" dependsOnModule="MyCompany_ExampleAdminNewPage" action="exampleadminnewpage/helloworld" resource="MyCompany_ExampleAdminNewPage::greetings"/>
    </menu>
</config>
etc/adminhtml/routes.xml
Under etc/adminhtml create the file routes.xml. The contents of this XML file tells Magento to route requests that use the frontName exampleadminnewpage to this module.
1
2
3
4
5
6
7
8
<?xml version="1.0"?>
<config xmlns:xsi="http://www.w3.org/2001/XMLSchema-instance" xsi:noNamespaceSchemaLocation="urn:magento:framework:App/etc/routes.xsd">
    <router id="admin">
        <route id="exampleadminnewpage" frontName="exampleadminnewpage">
            <module name="MyCompany_ExampleAdminNewPage"/>
        </route>
    </router>
</config>
Page controller
Now that we have a link to the Hello World page, we need to create the file needed to handle that request.
Controller/Adminhtml/HelloWorld/Index.php
In the module’s root directory, run the following command:
1
mkdir -p Controller/Adminhtml/HelloWorld
Inside Controller/Adminhtml/HelloWorld directory, create the file Index.php. This file is the class assigned to the default Index action for the HelloWorld controller. Since the admin area serves this page, the file belongs in the Adminhtml directory, and the class itself extends \Magento\Backend\App\Action.
1
2
3
4
5
6
7
8
9
10
11
12
13
14
15
16
17
18
19
20
21
22
23
24
25
26
27
28
29
30
31
32
33
34
35
<?php
  namespace MyCompany\ExampleAdminNewPage\Controller\Adminhtml\HelloWorld;

  class Index extends \Magento\Backend\App\Action
  {
    /**
    * @var \Magento\Framework\View\Result\PageFactory
    */
    protected $resultPageFactory;

    /**
     * Constructor
     *
     * @param \Magento\Backend\App\Action\Context $context
     * @param \Magento\Framework\View\Result\PageFactory $resultPageFactory
     */
    public function __construct(
        \Magento\Backend\App\Action\Context $context,
        \Magento\Framework\View\Result\PageFactory $resultPageFactory
    ) {
         parent::__construct($context);
         $this->resultPageFactory = $resultPageFactory;
    }

    /**
     * Load the page defined in view/adminhtml/layout/exampleadminnewpage_helloworld_index.xml
     *
     * @return \Magento\Framework\View\Result\Page
     */
    public function execute()
    {
         return  $resultPage = $this->resultPageFactory->create();
    }
  }
?>
Page view
Now that Magento knows how to handle requests for the Hello World page, we need view files that define the look of the page.
Create the necessary directories for the files by running the following commands from the module’s root directory:
1
2
mkdir -pm view/adminhtml/layout
mkdir -pm view/adminhtml/templates
These files belong in the view/adminhtml directory because the Magento admin area use these files during page generation.
view/adminhtml/layout/exampleadminnewpage_helloworld_index.xml
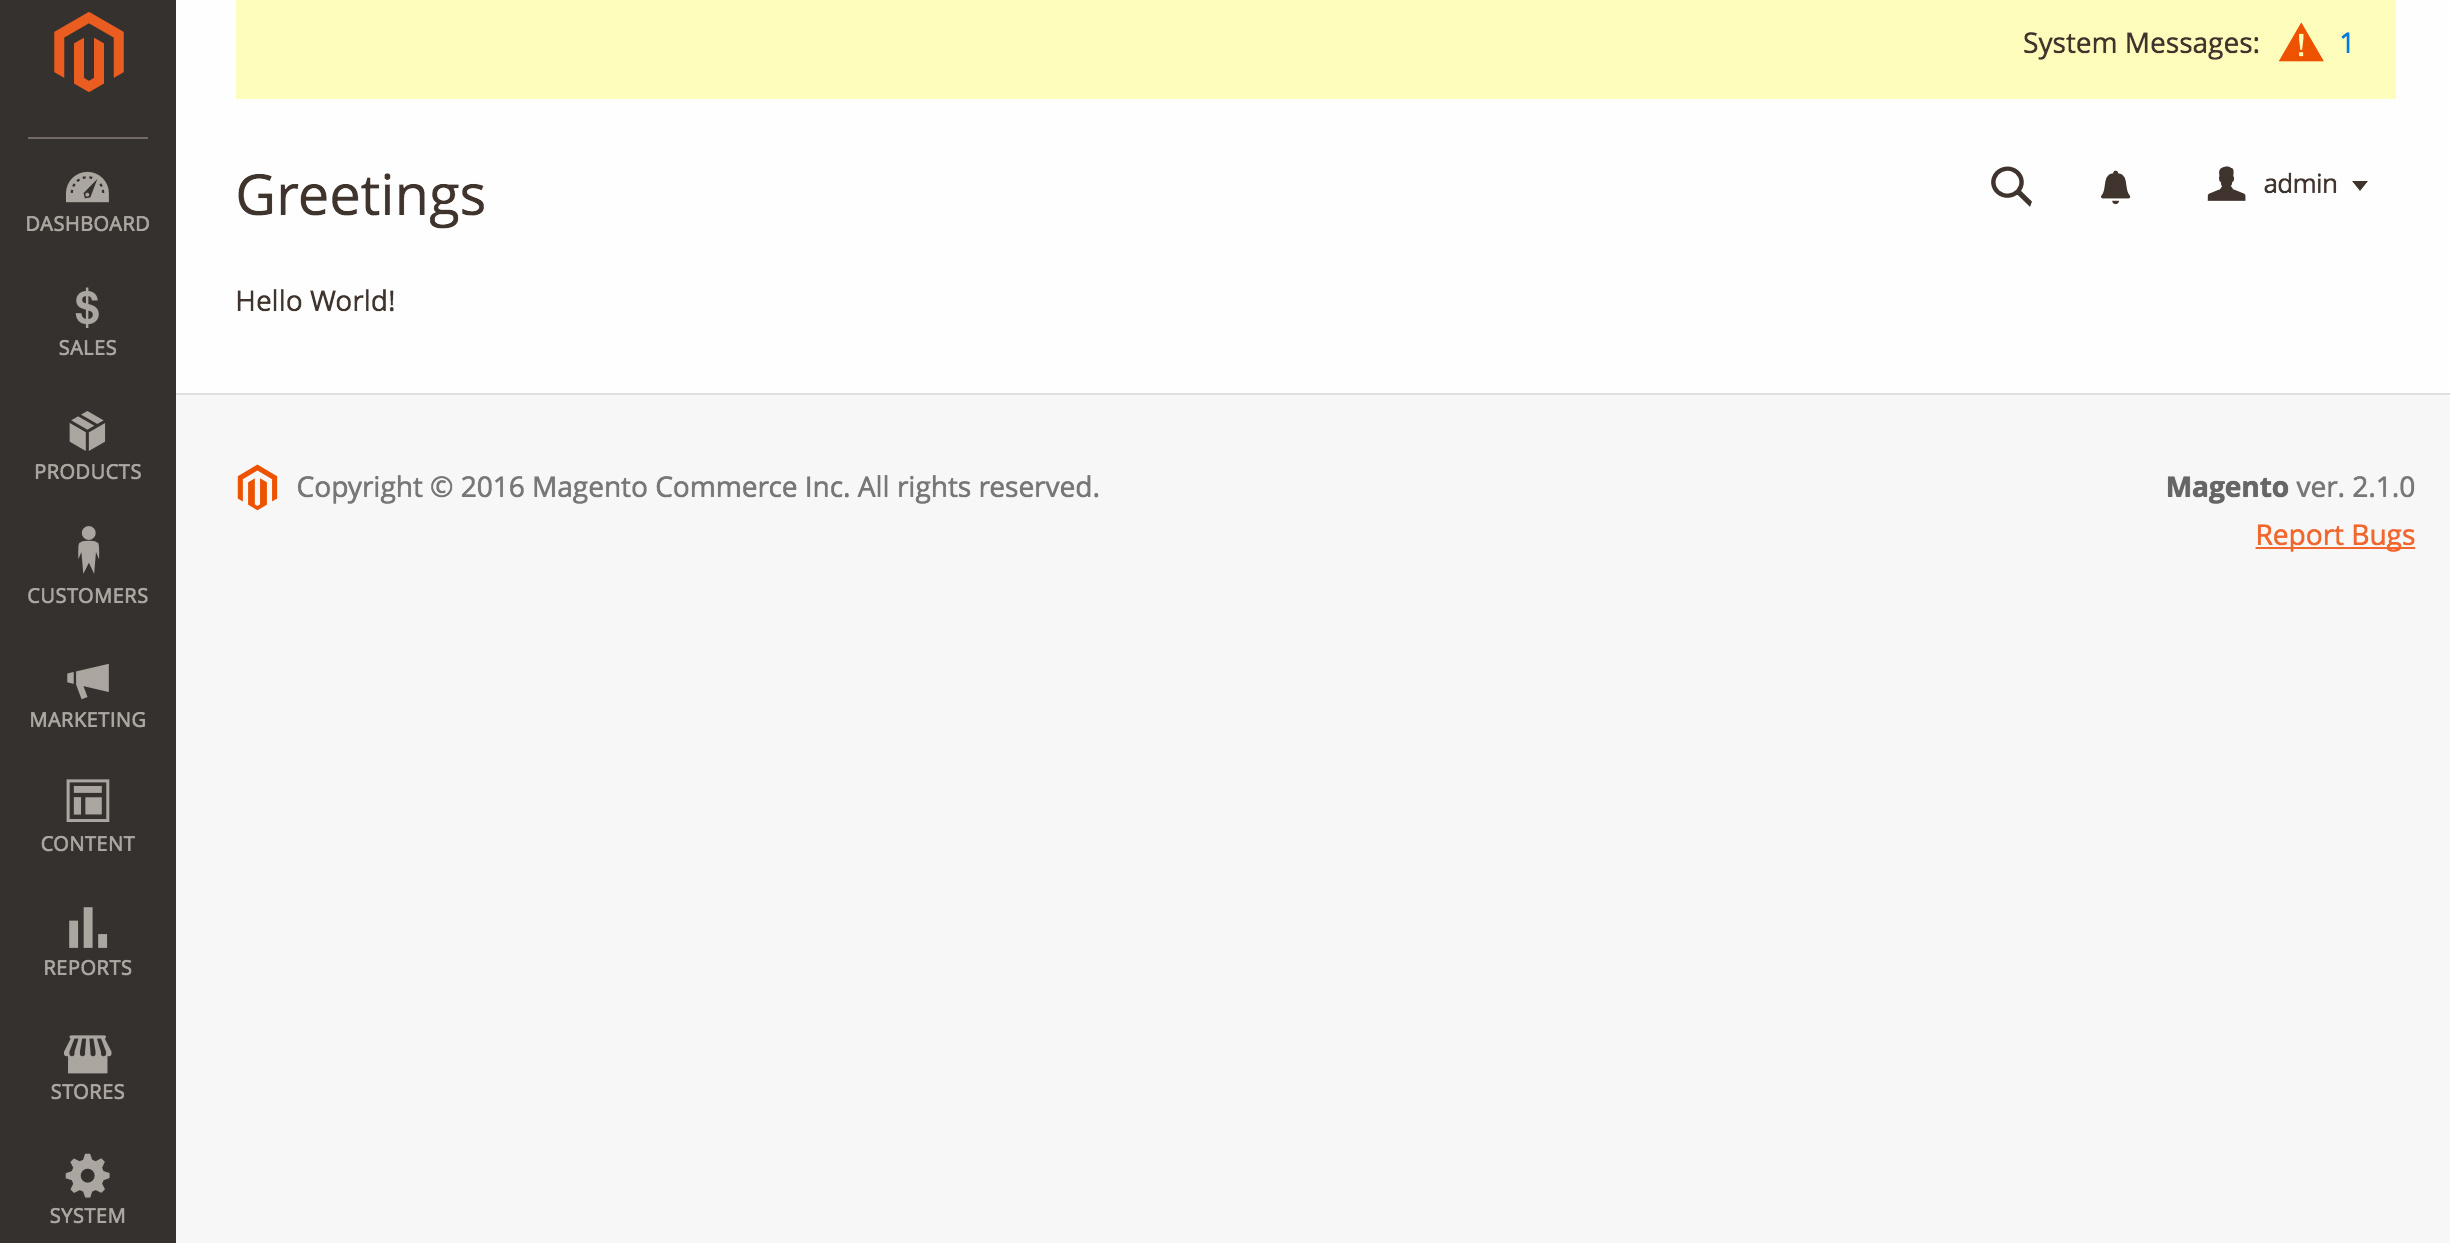
This file defines the layout and structure of the index page for the HelloWorld controller. It sets the title to “Greetings” and instructs Magento to use the helloworld.phtml template as the content in a Magento\Backend\Block\Template block class.
The name of this file uses the following pattern: routeId_controller_action.xml
1
2
3
4
5
6
7
8
9
10
11
12
13
<?xml version="1.0"?>
<page xmlns:xsi="http://www.w3.org/2001/XMLSchema-instance" xsi:noNamespaceSchemaLocation="urn:magento:framework:View/Layout/etc/page_configuration.xsd">
    <head>
        <title>
            Greetings
        </title>
    </head>
    <body>
        <referenceContainer name="content">
            <block class="Magento\Backend\Block\Template" template="MyCompany_ExampleAdminNewPage::helloworld.phtml"/>
        </referenceContainer>
    </body>
</page>
view/adminhtml/templates/helloworld.phtml
This template file contains the actual page content for the Hello World page.
1
 <p>Hello World!</p>
Full module directory structure
The module is now complete. Your module’s directory structure under app/code should look like the following:
MyCompany
`-- ExampleAdminNewPage
    |
    |-- Controller
    |   |-- Adminhtml
    |       |-- HelloWorld
    |           `-- <a href="#controlleradminhtmlhelloworldindexphp">Index.php</a>
    |-- etc
    |   |-- adminhtml
    |   |   |-- <a href="#etcadminhtmlmenuxml">menu.xml</a>
    |   |   `-- <a href="#etcadminhtmlroutesxml">routes.xml</a>
    |   `-- <a href="#etcmodulexml">module.xml</a>
    |-- view
    |   |-- adminhtml
    |       |-- layout
    |       |    `-- <a href="#viewadminhtmllayoutexampleadminnewpagehelloworldindexxml">exampleadminnewpage_helloworld_index.xml</a>
    |       `-- templates
    |           `-- <a href="#viewadminhtmltemplateshelloworldphtml">helloworld.phtml</a>
    |-- <a href="#composerjson">composer.json</a>
    `-- <a href="#registrationphp">registration.php</a>
Installing the module
Now that the module is code-complete, run the following commands to install it:
bin/magento module:status- This command shows a list of enabled/disabled modules.bin/magento module:enable MyCompany_ExampleAdminNewPage- If necessary, run this to enable the disabled module.bin/magento setup:upgrade- This command will properly register the module with Magento.bin/magento setup:di:compile- This command compiles classes used in dependency injections.bin/magento cache:clean- This command cleans the cache.
Once the module installation has completed, the link to the Hello World page should appear in the Greetings section under Content in the left navigation in the admin area. Clicking this link will take you to a page that looks like the one pictured below.