Running Unit Tests in PhpStorm
Running tests in PhpStorm requires following steps to setup the system.
- Configuring the PHP interpreter
- Configuring PHPUnit
- Creating a run configuration
Configuring the PHP interpreter
In the PhpStorm preferences, select the PHP interpreter PhpStorm should use to run tests with.
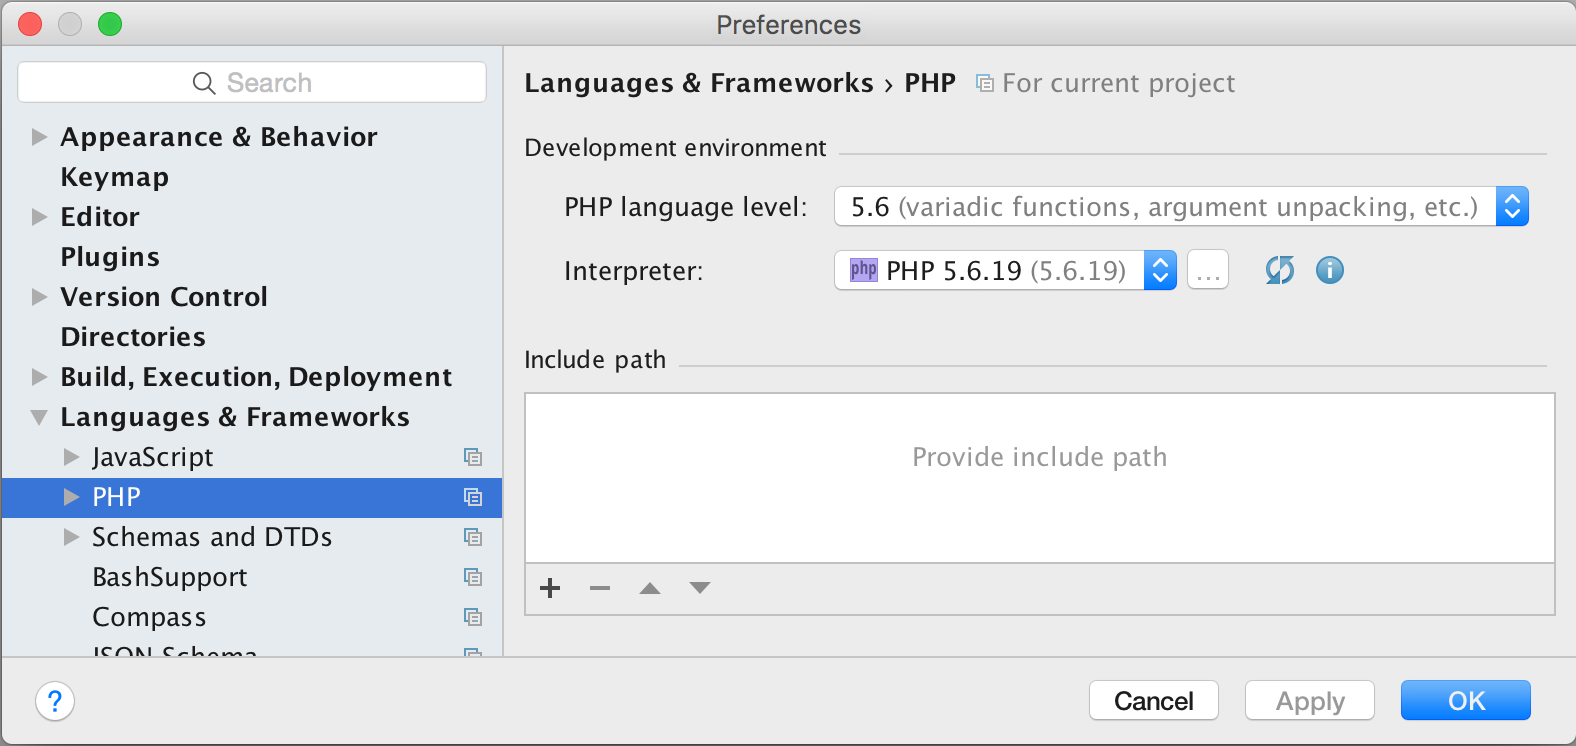
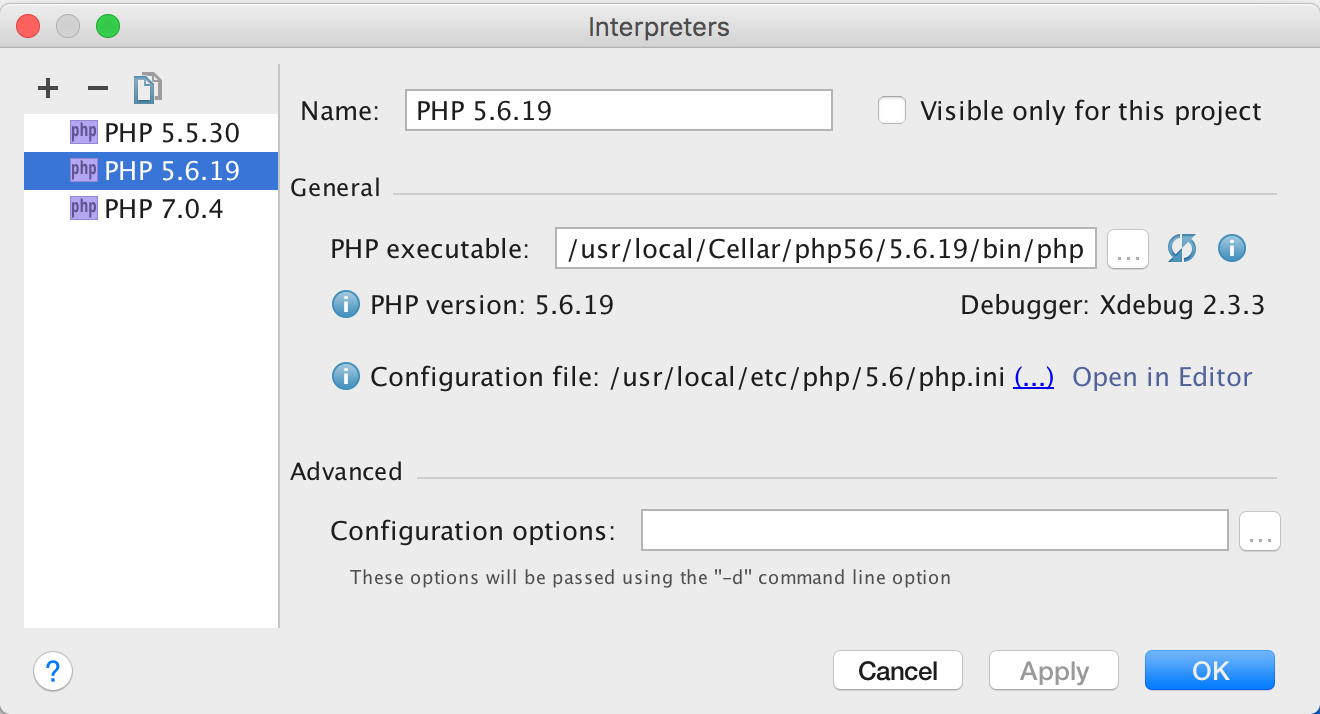
If you can not select a PHP interpreter because the dropdown is empty, you can add a one by clicking on the button with the three dots beside the dropdown.
Then, click the + (add) button in the top right to select the desired PHP binary on your file system.
Please refer to the PhpStorm documentation for further information on how to configure a local PHP interpreter.
It is also possible to configure a remote PHP interpreter, which is a common setup when working with Vagrant or Docker based development environments.
Please be aware that the details on configuring the PHP interpreter might vary between PhpStorm versions.
Configuring PHPUnit
After configuring the interpreter, the next step is to set up the PHPStorm preferences for how to execute PHPUnit.

- Click the Use custom autoloader option.
- Select the
vendor/autoload.phpfile in your Magento 2 installation. - Optionally select the
dev/tests/unit/phpunit.xml.distfile as the Default configuration file. Doing this step makes creating temporary run configurations more convenient.
Please refer to the PhpStorm documentation for further information on enabling PHPUnit in PhpStorm.
Creating a run configuration
The final step is to create a run configuration to execute the desired tests.
There are many ways to create run configurations in PhpStorm. Here we just show one of the option.
All start by creating a new run configuration. To do so, follow these steps:
- Select the Run > Edit Configurations action from the top menu.
- Click the + symbol on the top right and select PHPUnit.
Depending on what tests should be included in the run configuration, the next steps differ.
Running all tests
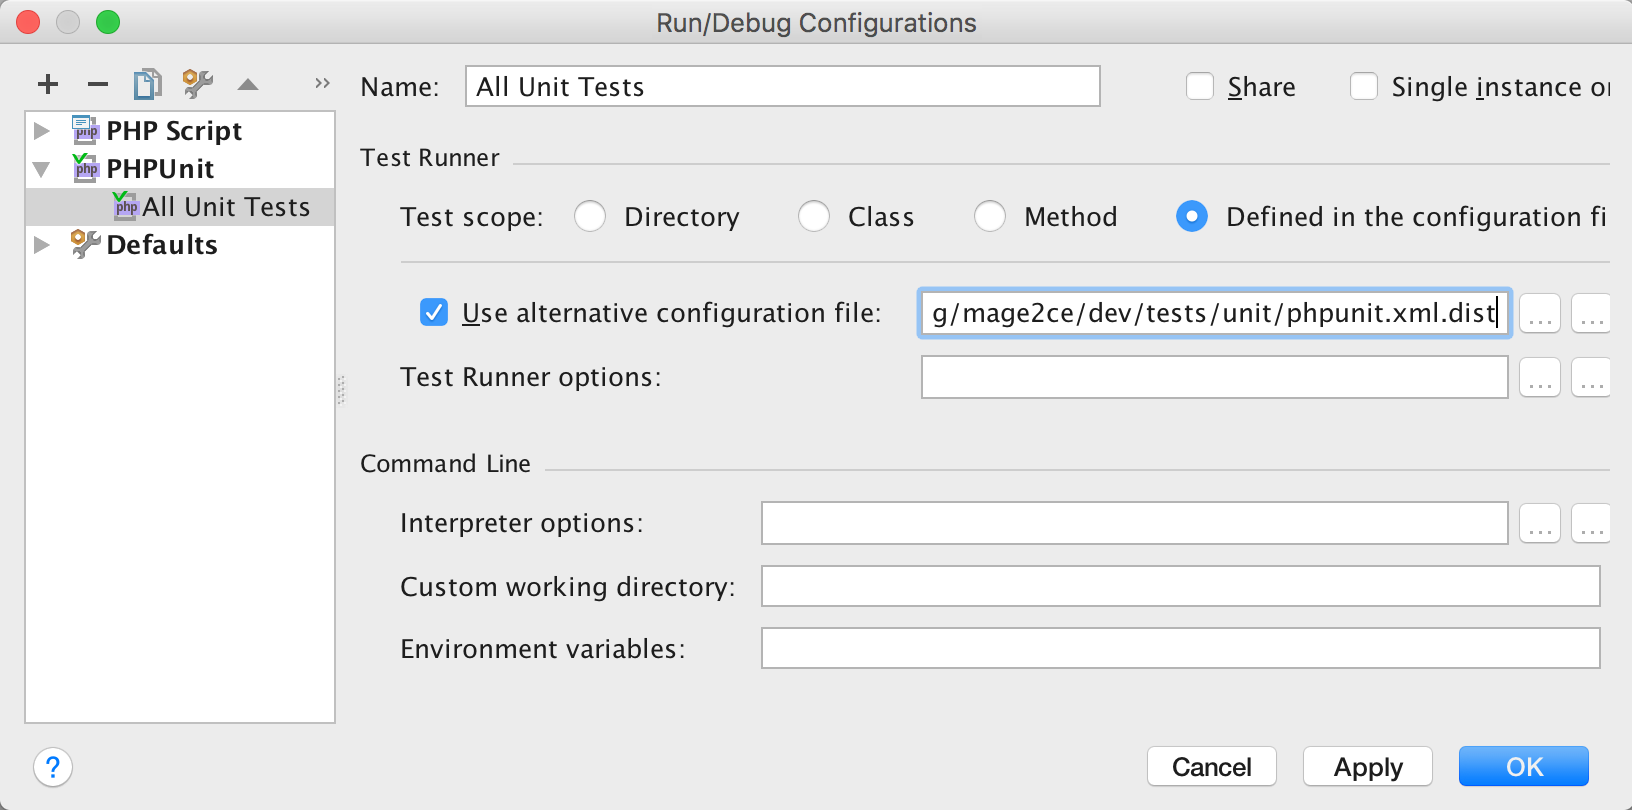
- Give the run configuration a descriptive name; for example All Unit Tests
- Test Scope: select the Defined in the configuration file radio button
- Check the Use alternative configuration file checkbox
- Select the file
dev/tests/unit/phpunit.xml.dist - Click OK.
Running the tests of one module
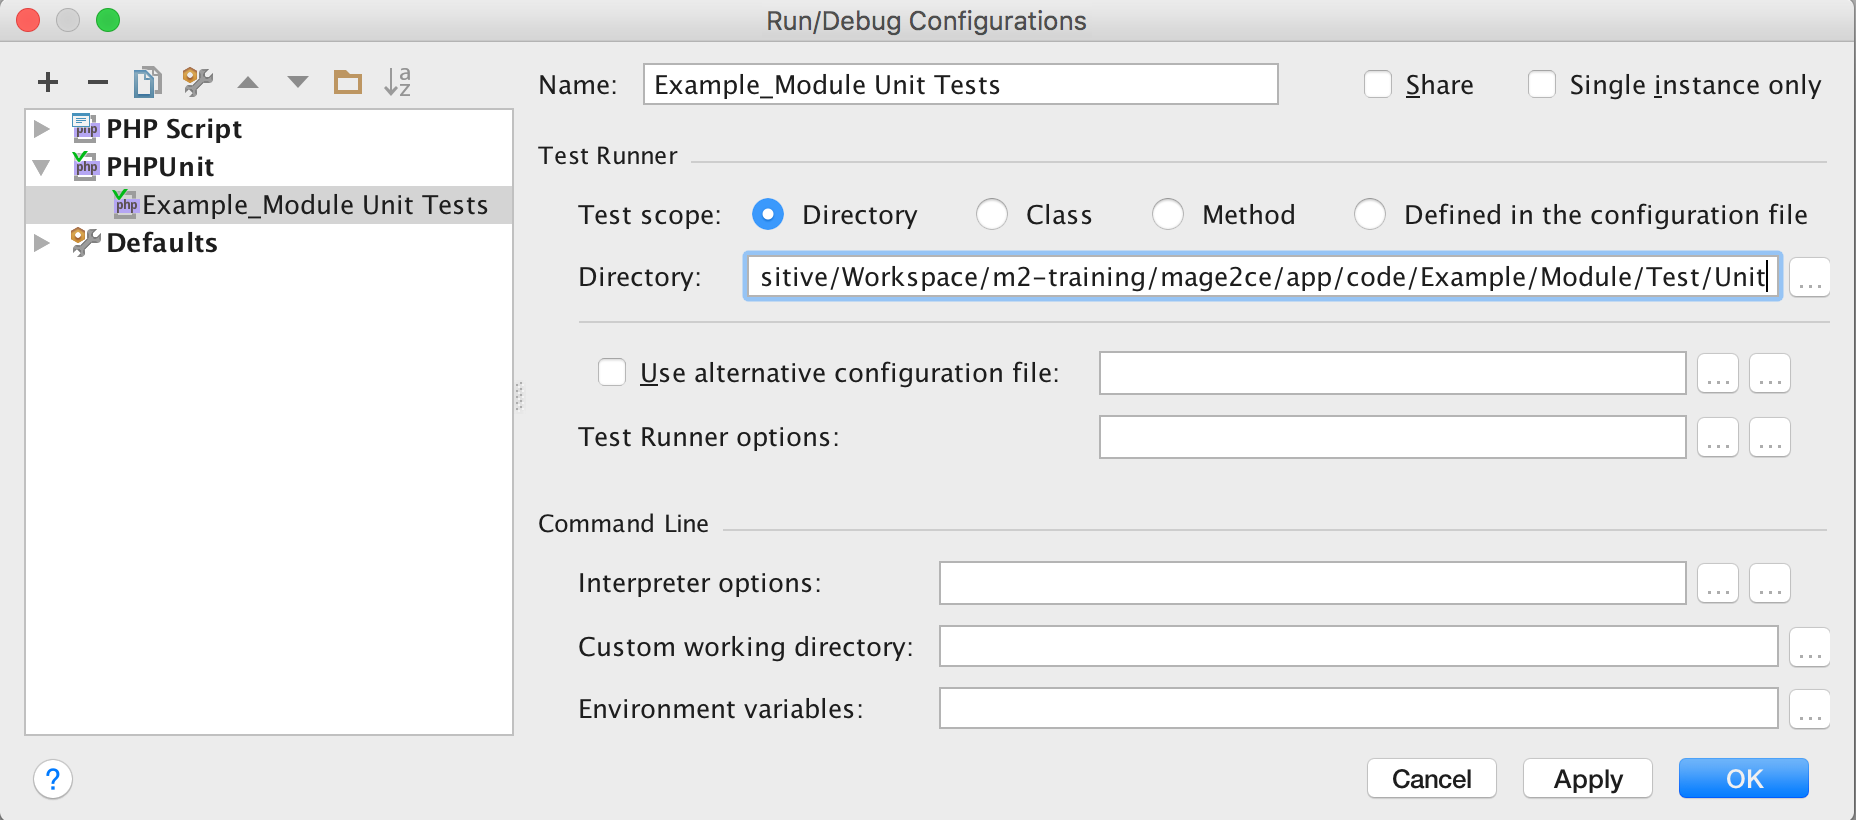
- Give the run configuration a descriptive name; for example, Example_Module Unit Tests
- Test Scope: select the Directory option
- Select the directory containing the modules unit tests. PHPUnit will run every file ending with
Test.phpin the selected directory branch. - Click OK.
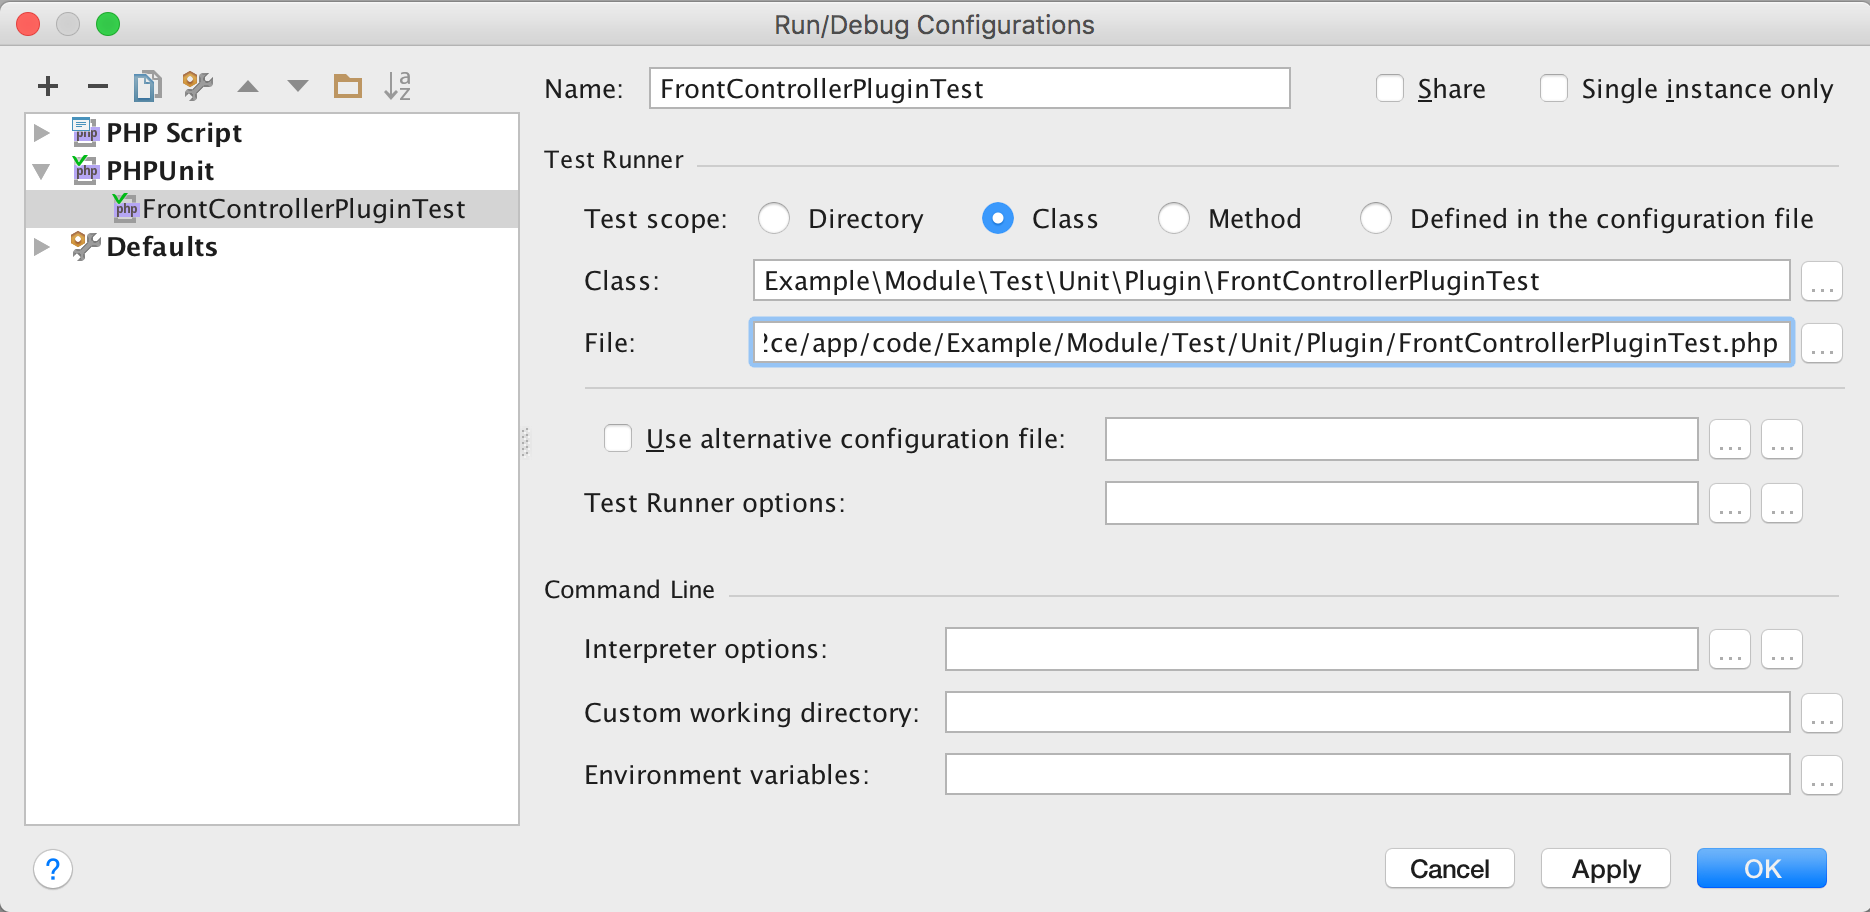
Running the tests in a class
- Give the run configuration a descriptive name like the name of the test class; for example, FrontControllerPluginTest.
- Test Scope: select the Class option.
- Class: enter the fully qualified class name (including the PHP namespace).
- File: select the file containing the test class.
- Click OK.
A more convenient way to create a run configuration for a test class is to open the class in PhpStorm, and then right-clicking into the class and selecting Create ‘TestClassName’ or Run ‘TestClassName’.
Note that the test class has to inherit from \PHPUnit_Framework_TestCase for PhpStorm to display that option.
Executing the run configuration
First select the run configuration to execute in the run configuration drop-down menu above the main editor window, then click the Play icon beside it.
By clicking the Debug icon (of a bug) next to the Play icon, it is possible to step-debug code during test execution, if the xdebug PHP extension is installed.